-
Getting Started
-
Environment Management
-
Proxy
-
Group Management
-
Automation
-
FAQs
Step 4: Purchase official proxy IP
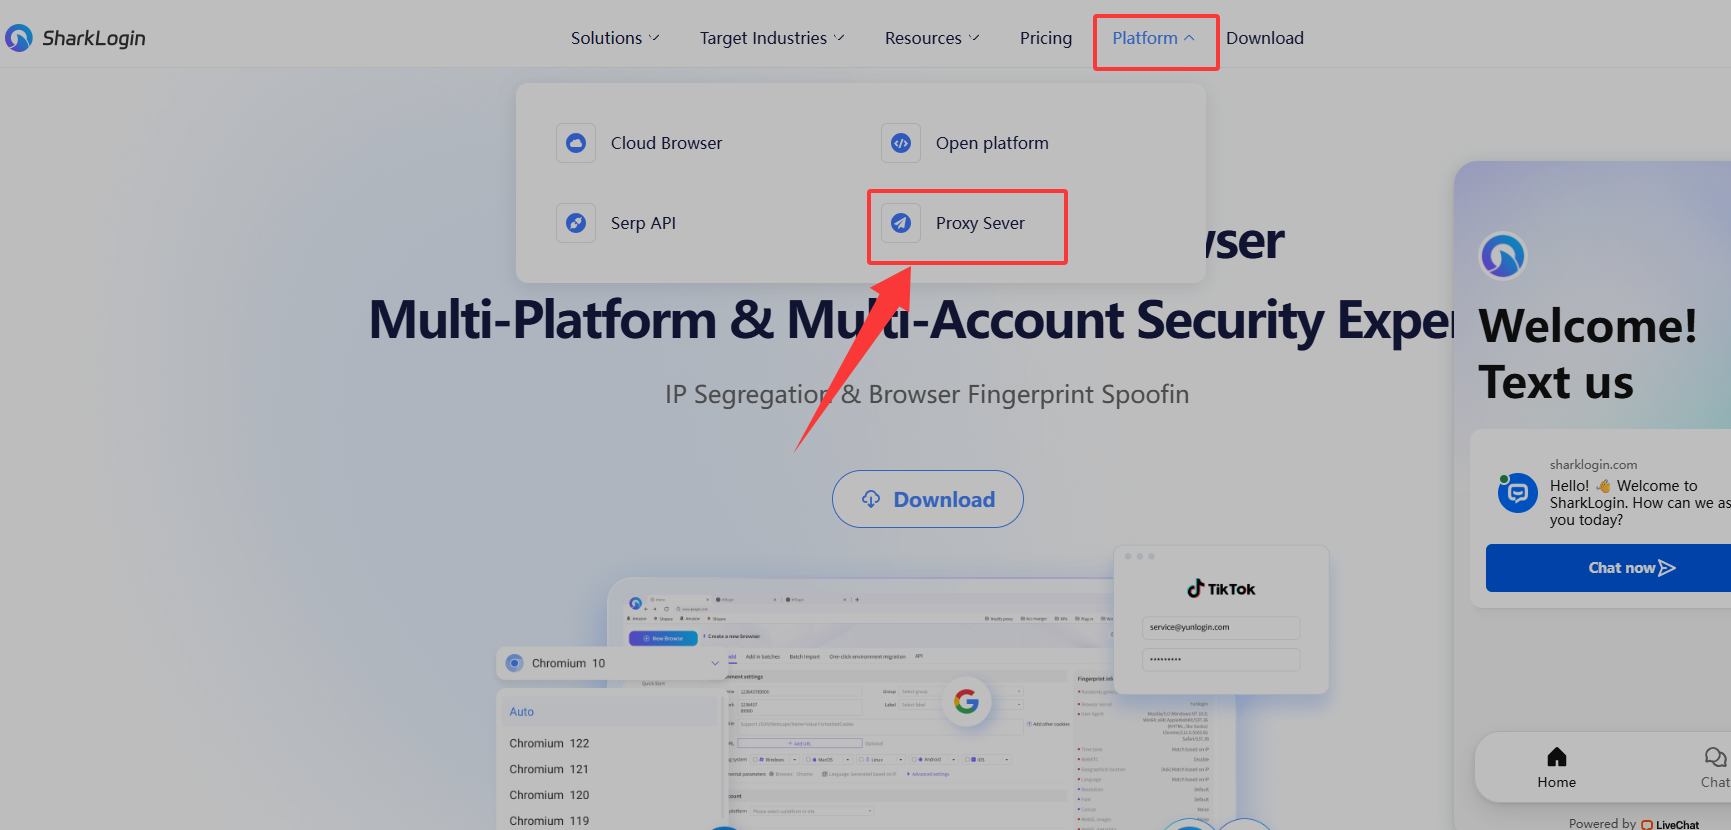
Step 1: Access the Proxy Service Page
Visit the SharkLogin official website and click the “Platform” option in the top navigation bar. From the dropdown menu, select “Proxy Server” to enter the proxy service page.
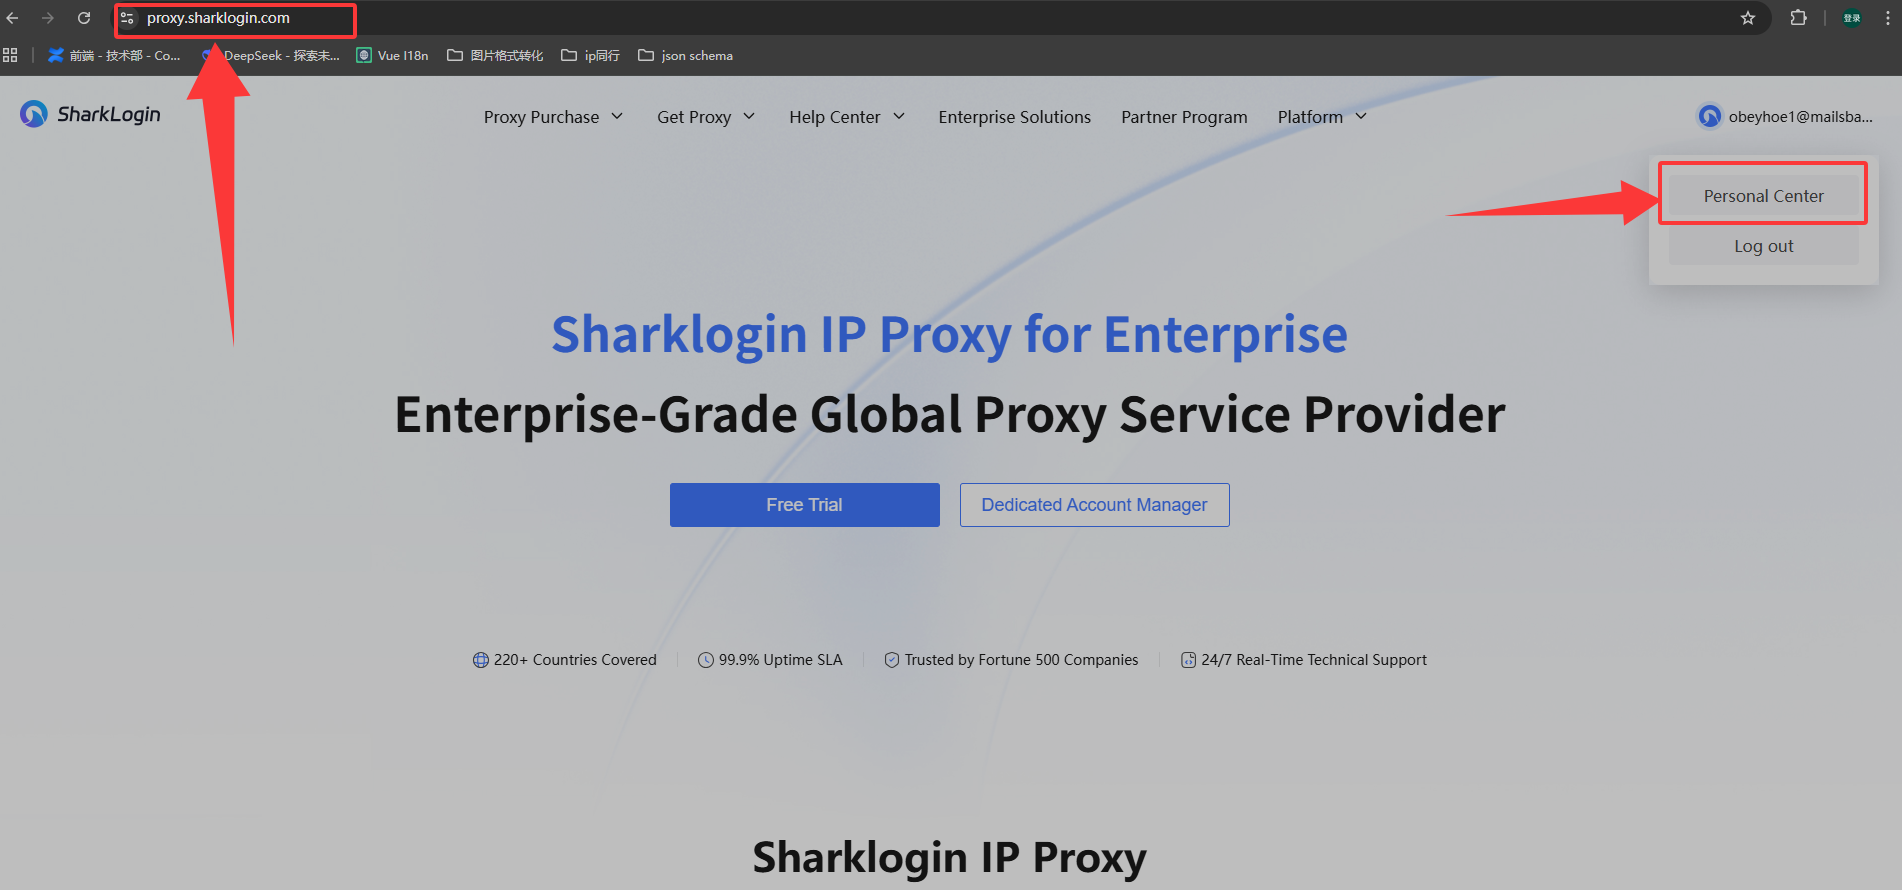
Step 2: Enter Personal Center
On the proxy service page, the URL will show as “proxy.sharklogin.com.” Click the user-related area in the top-right corner of the page and select “Personal Center” to access the personal center page.
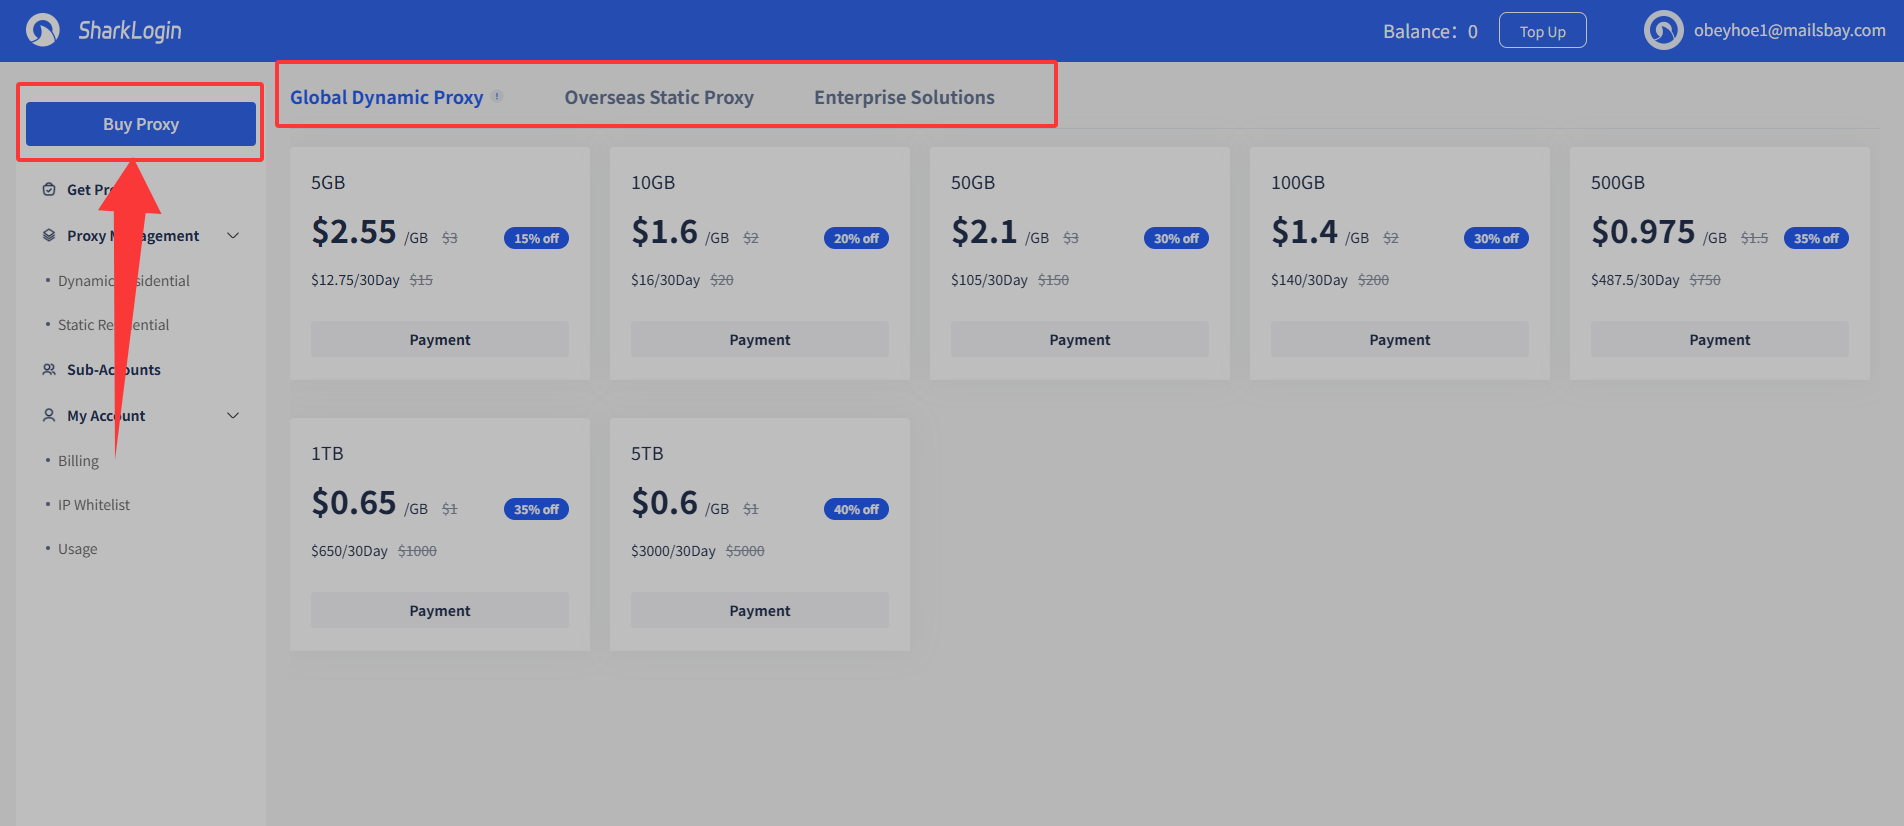
Step 3: Navigate to the Buy Proxy Page
In the personal center, click the “Buy Proxy” button on the left side. The page will display various proxy type options, such as “Global Dynamic Proxy,” “Overseas Static Proxy,” and “Enterprise Solutions.”
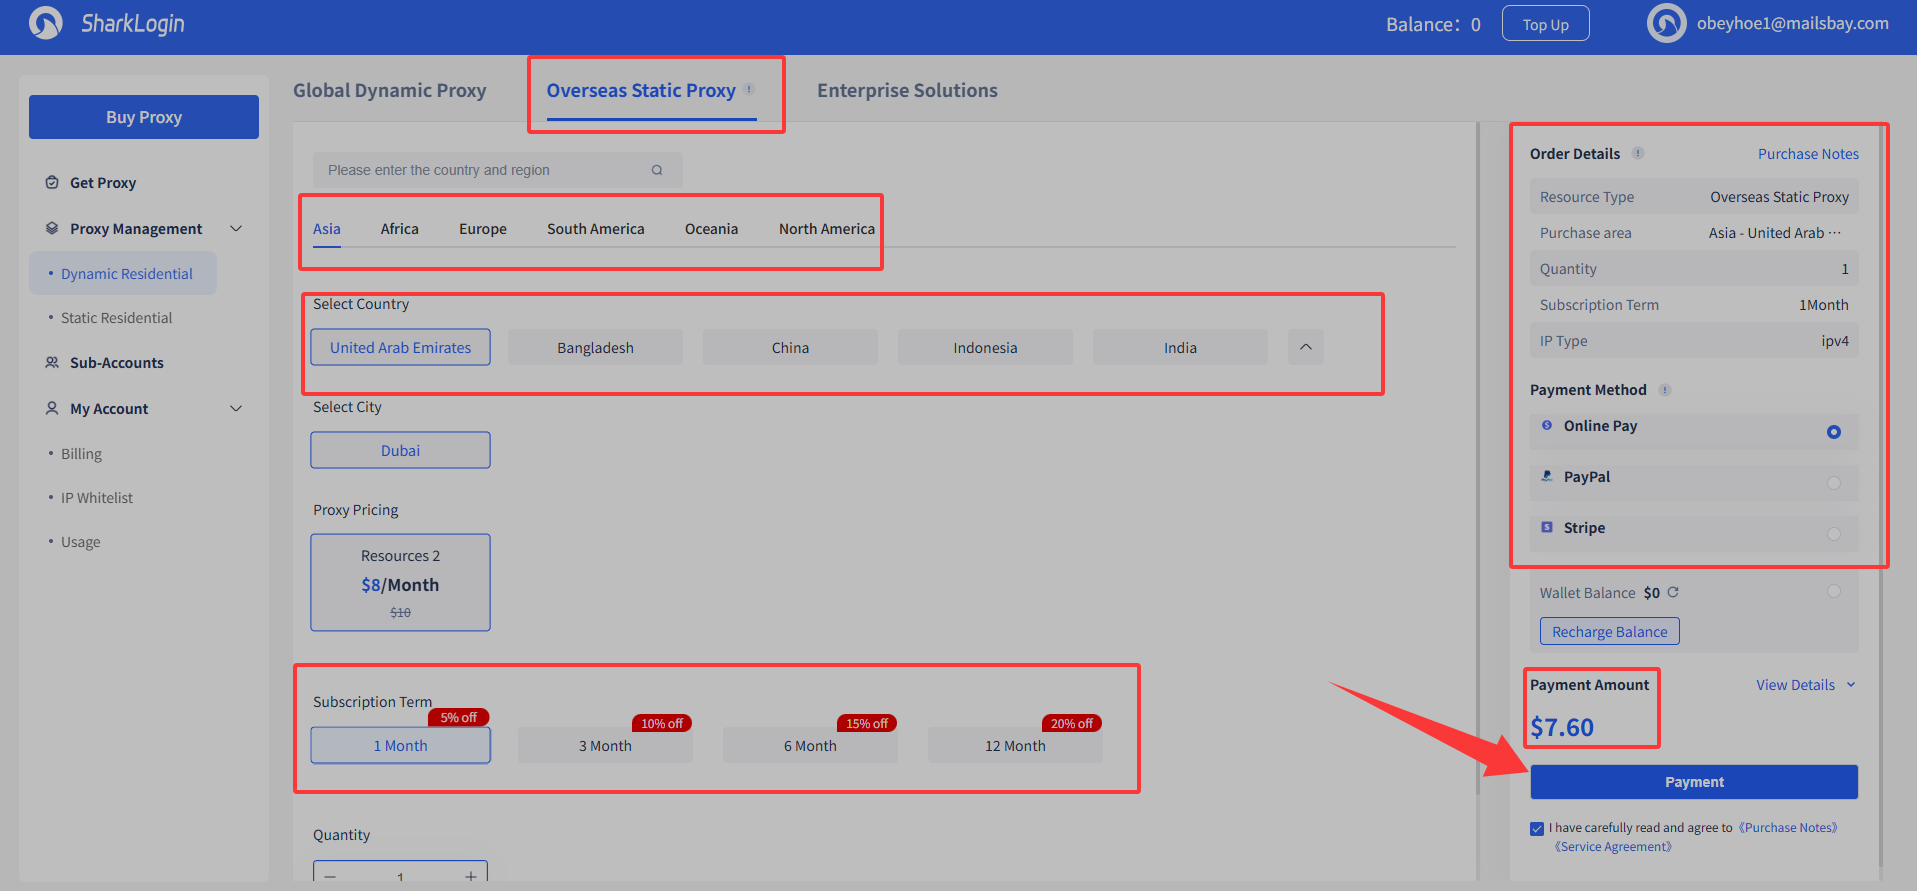
Step 4: Select Proxy and Complete Purchase
- Choose the desired proxy type (e.g., click “Overseas Static Proxy”).
- Select the region (e.g., Asia, Africa, Europe), country, and city.
- Set the subscription duration, quantity, and payment method (e.g., Online Pay, PayPal, Stripe).
- Review the order details and payment amount, check the box to agree to the terms, and click the “Payment” button to complete the purchase.
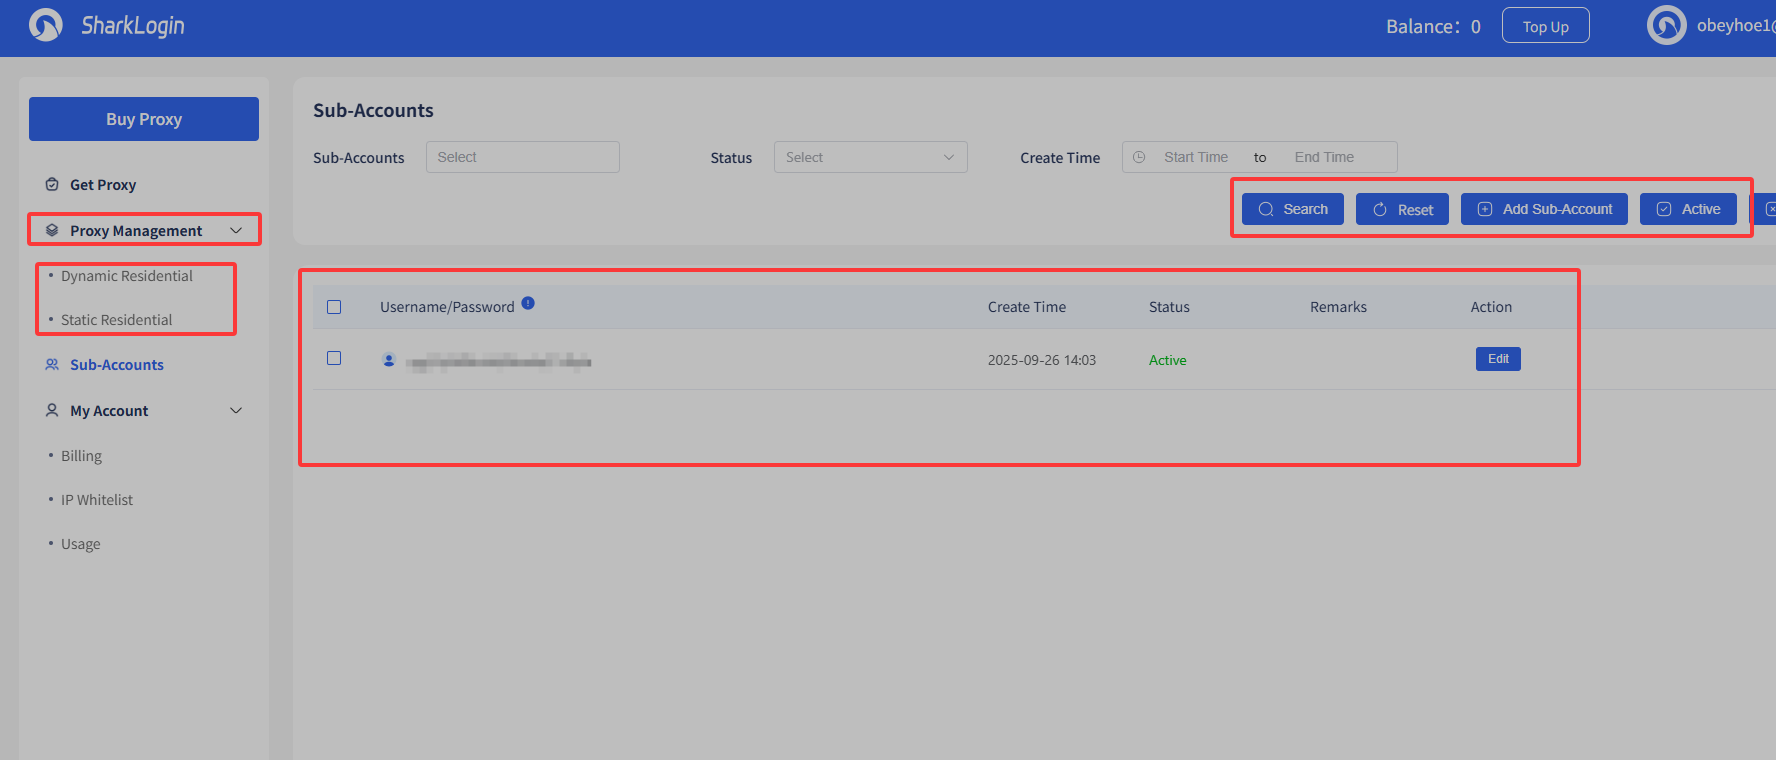
Step 5: Manage and Use Proxies
After the purchase, you can view proxy details in “Proxy Management” under sections like “Dynamic Residential” or “Static Residential.” You can also manage sub-accounts in the “Sub-Accounts” page. To use the purchased official proxy IPs, import the proxy IP or API into the SharkLogin client for normal operation.