-
Getting Started
-
Environment Management
-
Proxy
-
Group Management
-
Automation
-
FAQs
Step 2: Bind proxy IP to environment
Step 1: Access the Proxy Management Page
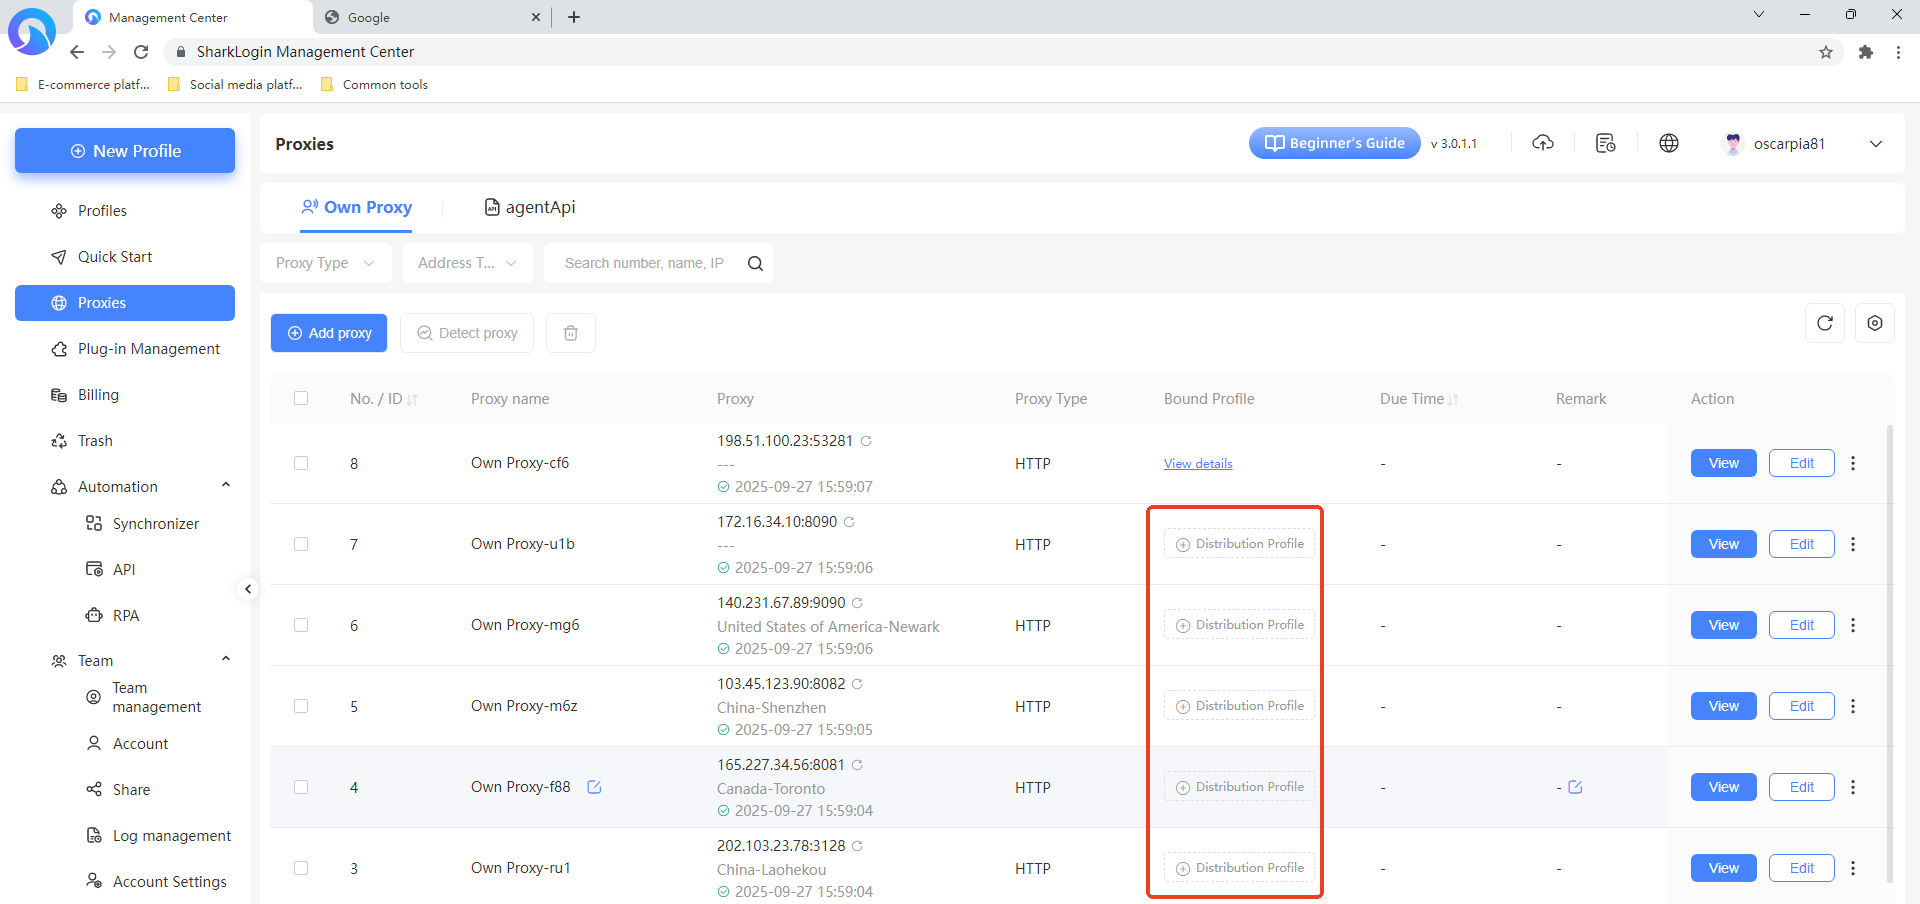
After logging into the SharkLogin client, click the “Proxy ” option in the left sidebar to enter the proxy management interface. By default, the “Own Proxy” page is displayed, showing a list of added proxies.
Step 2: Select Proxy and Assign Environment
In the proxy list on the “Own Proxy” page, find the proxy you want to bind to an environment and click the “Distribute profile ” button in the “Bound Profile ” column for that proxy.
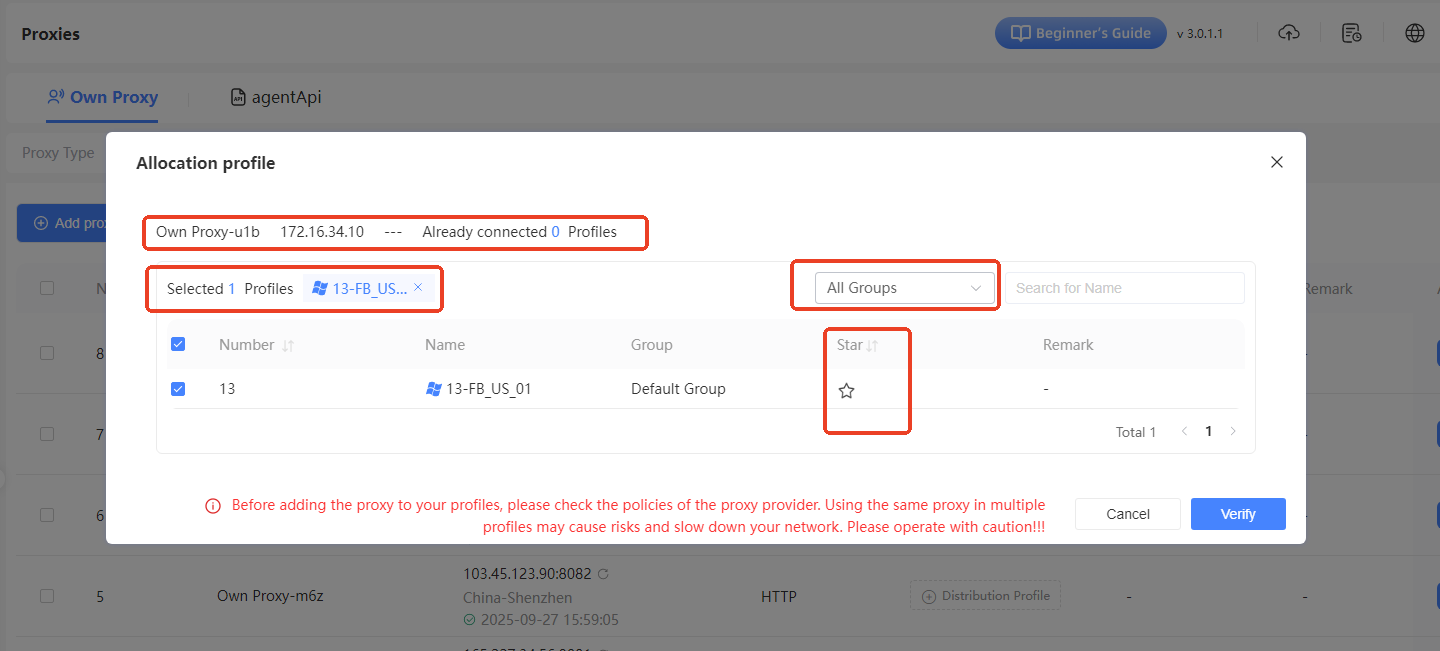
A “Assign Environment” window will pop up, displaying details like the proxy's IP (e.g., Own Proxy - j1g) and the number of environments already bound to it.
In the environment list, check the box for the environment(s) you want to bind to this proxy (e.g., FB_US_01). You can also use the “All Groups” dropdown to filter environments by group for quicker selection.
Step 3: Confirm Binding
After selecting the environment(s), carefully read the prompt at the bottom of the window (e.g., “Before binding a proxy to environments, review each platform's policies. Using the same proxy for multiple environments may lead to association risks or slower network speeds. Proceed with caution”). If everything looks good, click the “Confirm” button at the bottom right of the window to complete the binding of the proxy IP to the selected environment(s).