-
Getting Started
-
Environment Management
-
Proxy
-
Group Management
-
Automation
-
FAQs
Step 3: Environment IP Proxy Configuration
Step 3: Environment IP Proxy Configuration
When using the SharkLogin anti-detection fingerprint browser, adding a suitable IP proxy to your environment allows you to simulate network conditions from different regions, boosting both flexibility and security. Below are the detailed steps to get you started.

I. Access the Proxy Modification Interface
On the “Profiles” page, locate your target environment (e.g., the “FB_US_01” environment you created). Click the “More Options” button (usually a three-dot icon) in the “Actions” column for that environment, and select “Proxy” from the dropdown menu.

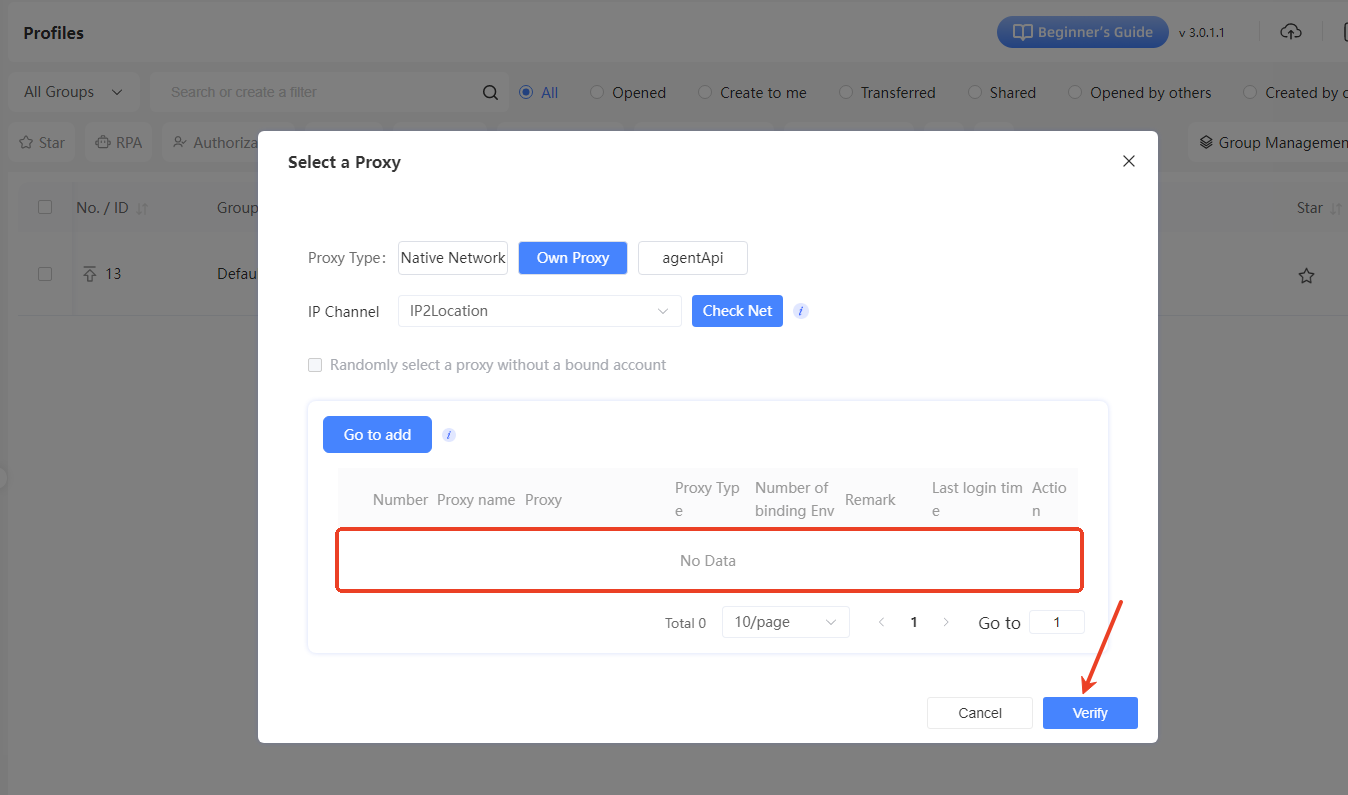
II. Select Proxy Type
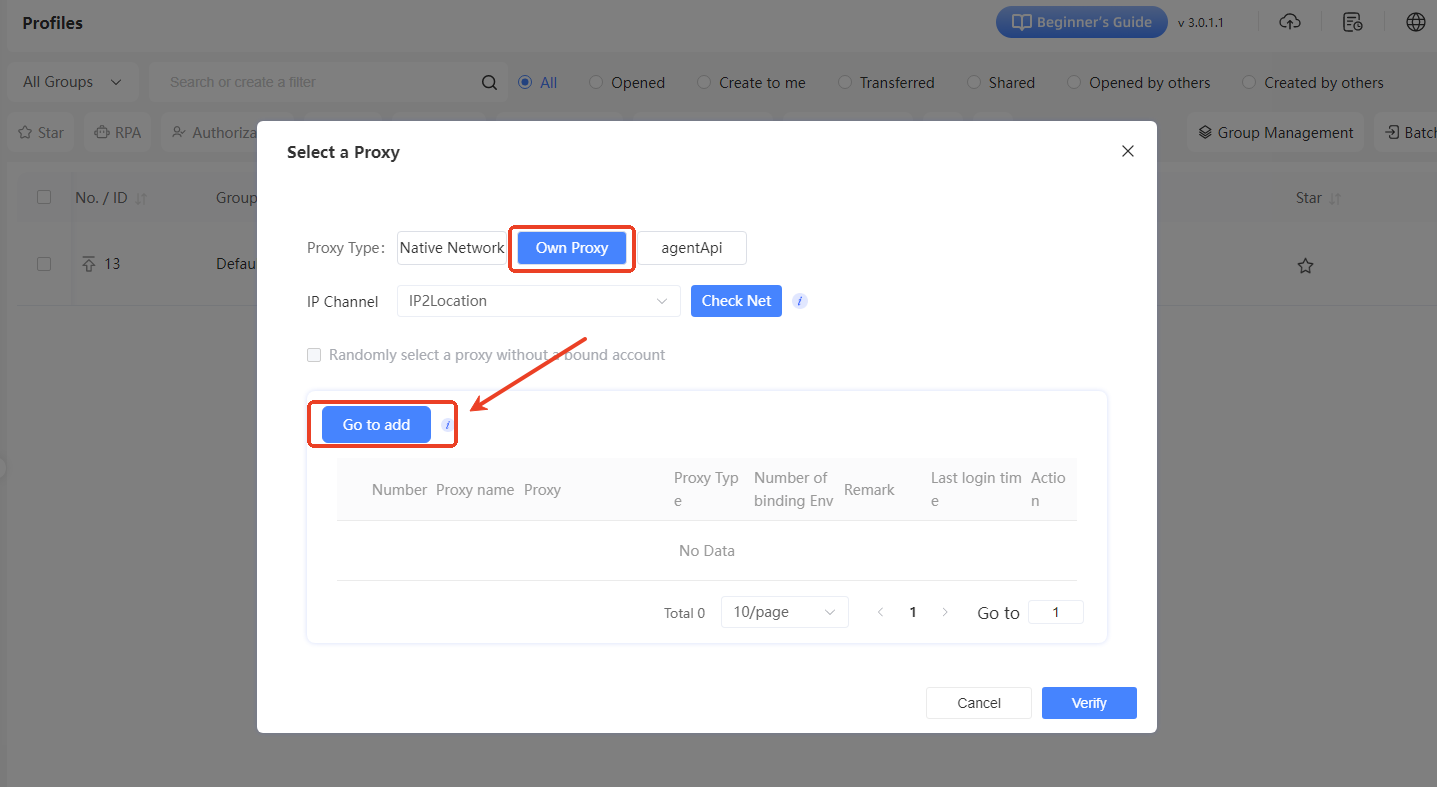
A “Select a Proxy” window will pop up. Choose the proxy type based on your needs. If you're using your own proxy, click the “Own Proxy” tab.
III. Add Your Own Proxy
In the “Own Proxy” tab, if you haven't added a proxy yet, click the “Go to Add” button. This will open the “Add Proxy” window.
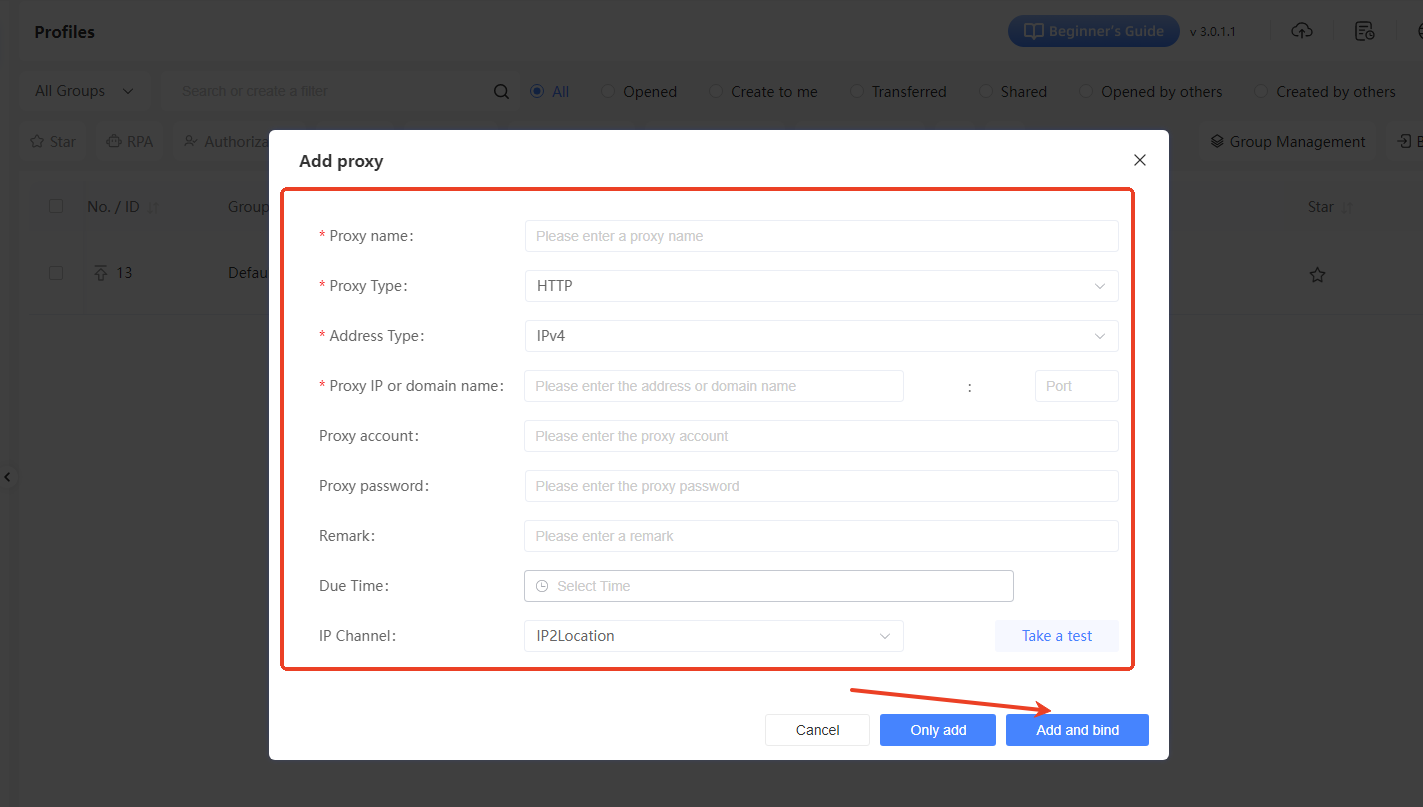
IV. Fill in Proxy Details
In the “Add Proxy” window, enter the following proxy information:
- Proxy Name: Give it a recognizable name, like “US_Proxy_01”.
- Proxy Type: Select the protocol type from the dropdown menu, such as HTTP, HTTPS, or SOCKS5, based on what your proxy provider offers.
- Address Type: Generally, choose IPv4.
- Proxy IP or Domain name: Enter the proxy's IP address or domain name, along with the corresponding port number.
- Proxy Account/Password: If the proxy requires authentication, fill in the username and password. Leave these blank if no authentication is needed.
- Remark: (Optional) Add any extra details about the proxy, like its region or use case.
- Due Date: Select or set the proxy's expiration date based on its validity period.
- IP Lookup Source: You can stick with the default IP2Location.After filling in all the details, click the “Add and Bind” button to add the proxy and bind it to the target environment.
V. Confirm Proxy Settings
Back in the “Select Proxy” window, you'll see the newly added proxy in the list. Double-check everything looks correct, then click the “Confirm” button to finalize the IP proxy setup for the environment. Once done, launch the environment, and it will operate using the proxy's network settings.