-
Getting Started
-
Environment Management
-
Proxy
-
Group Management
-
Automation
-
FAQs
Step 1: Add proxy IP to the client
Step 1: Access the Proxy Management Page
After logging into the SharkLogin client, click the “Proxy ” option in the left sidebar to enter the proxy management interface. Here, you'll see two tabs: “Own Proxy” and “AgentAPI.” The “Own Proxy” page is displayed by default, featuring buttons like “Add Proxy”.
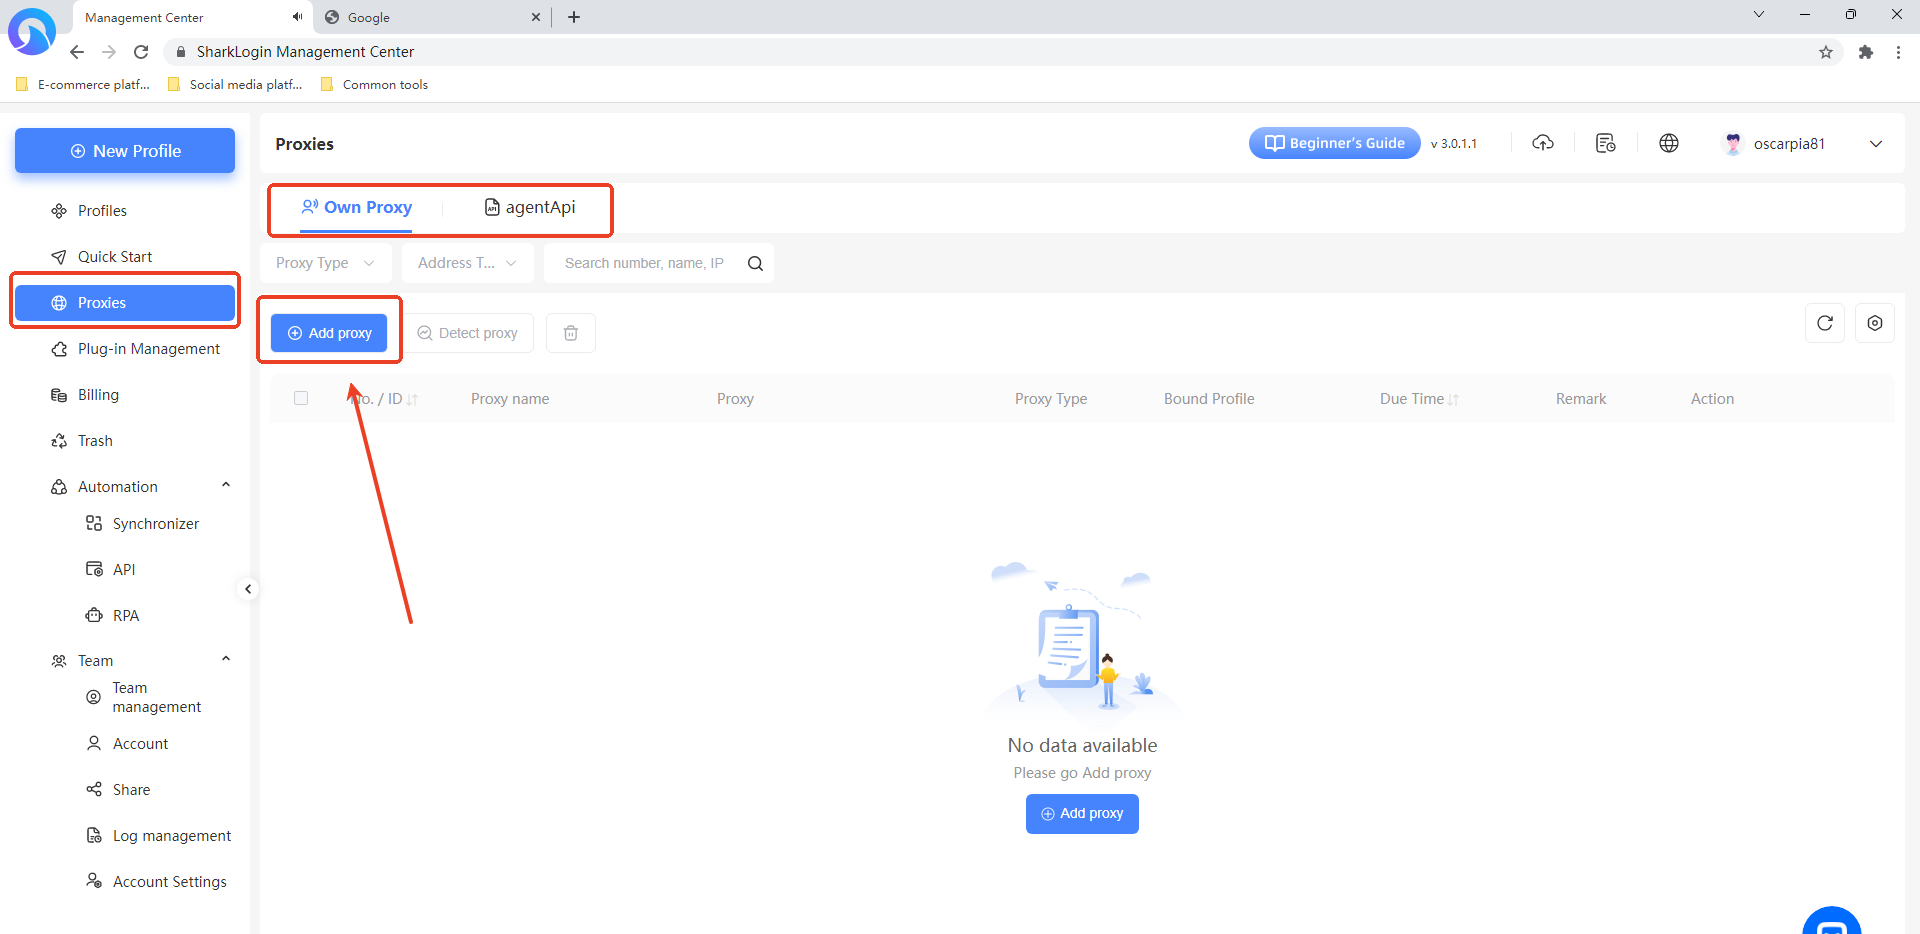
Step 2: Open the Add Proxy Window
On the “Own Proxy” page in “Proxy ,” click the “Add Proxy” button to open the “Add Proxy” window.
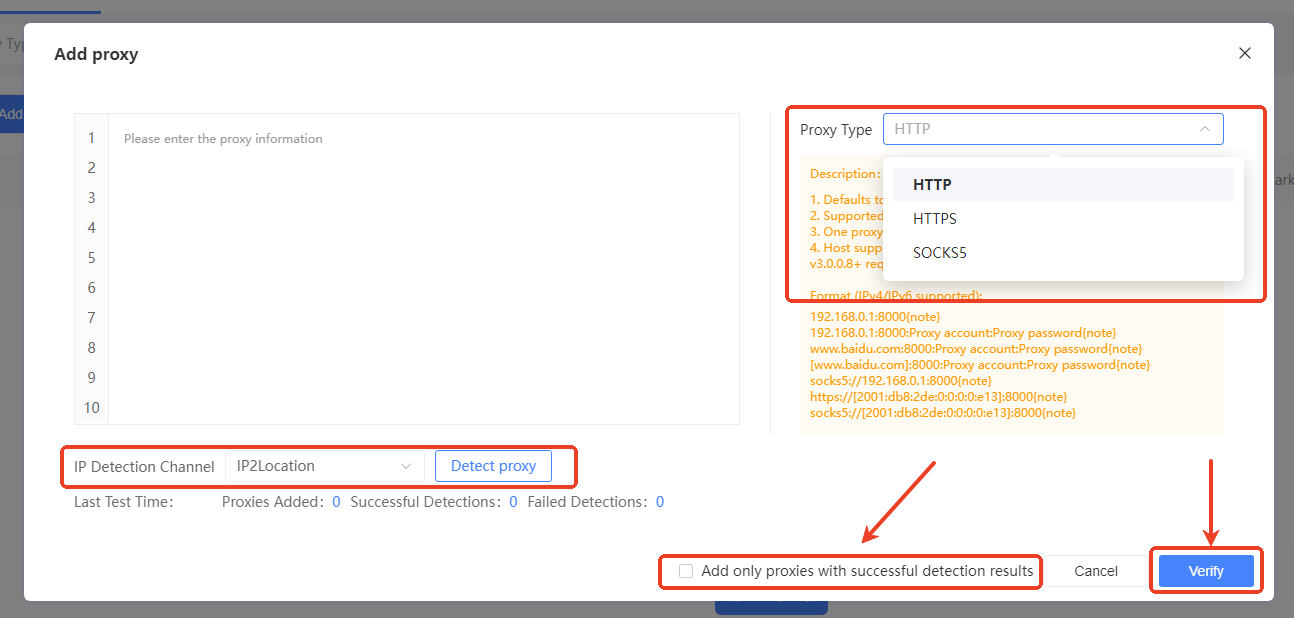
Step 3: Fill in Proxy Details
- Select Proxy Type: In the “Proxy Type” dropdown on the right side of the window, choose the proxy type you want to add (supports HTTP, HTTPS, SOCKS5, etc.).
- Enter Proxy Information: In the text box on the left, input proxy details in the specified format (supports IPv4 and IPv6). For example, for an HTTP proxy, enter something like 192.168.0.1:8000:username:password(notes). You can add up to 10 proxies, one per line.
- Select IP Lookup Source: In the “IP Lookup Source” dropdown at the bottom, choose a source for testing the proxy (e.g., IP2Location), then click the “Detect Proxy” button to verify the entered proxies.
- Add Only Successful Proxies (Optional): If you only want to add proxies that pass the test, check the “Add only proxies with successful detection results” box.
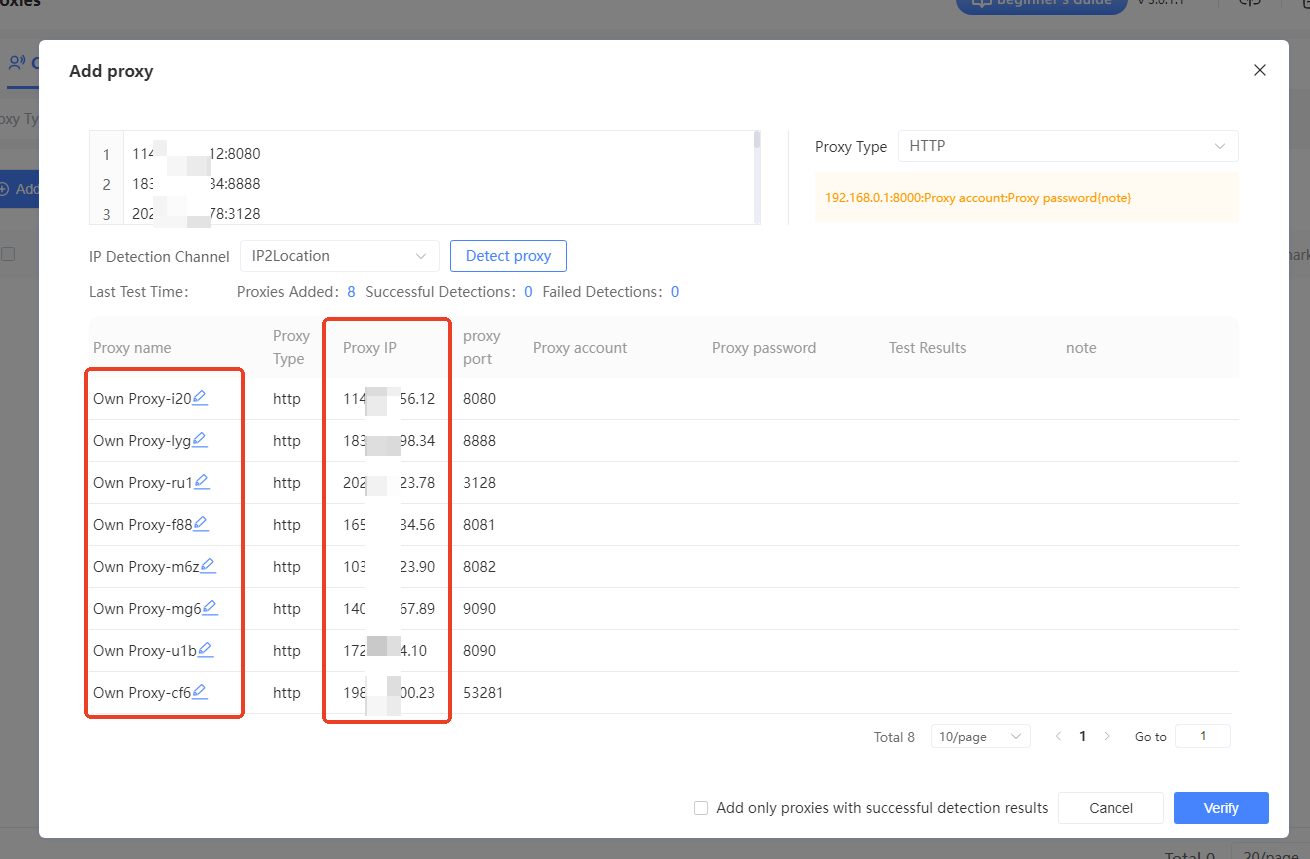
Step 4: Confirm Proxy Addition
After filling in the proxy details and testing, click the “Verify” button at the bottom right of the “Add Proxy” window. The system will add the proxy IPs based on your settings. Once added, the proxy list will display details like proxy name, type, IP, port, and statistics such as the number of proxies added, successful tests, and failed tests.
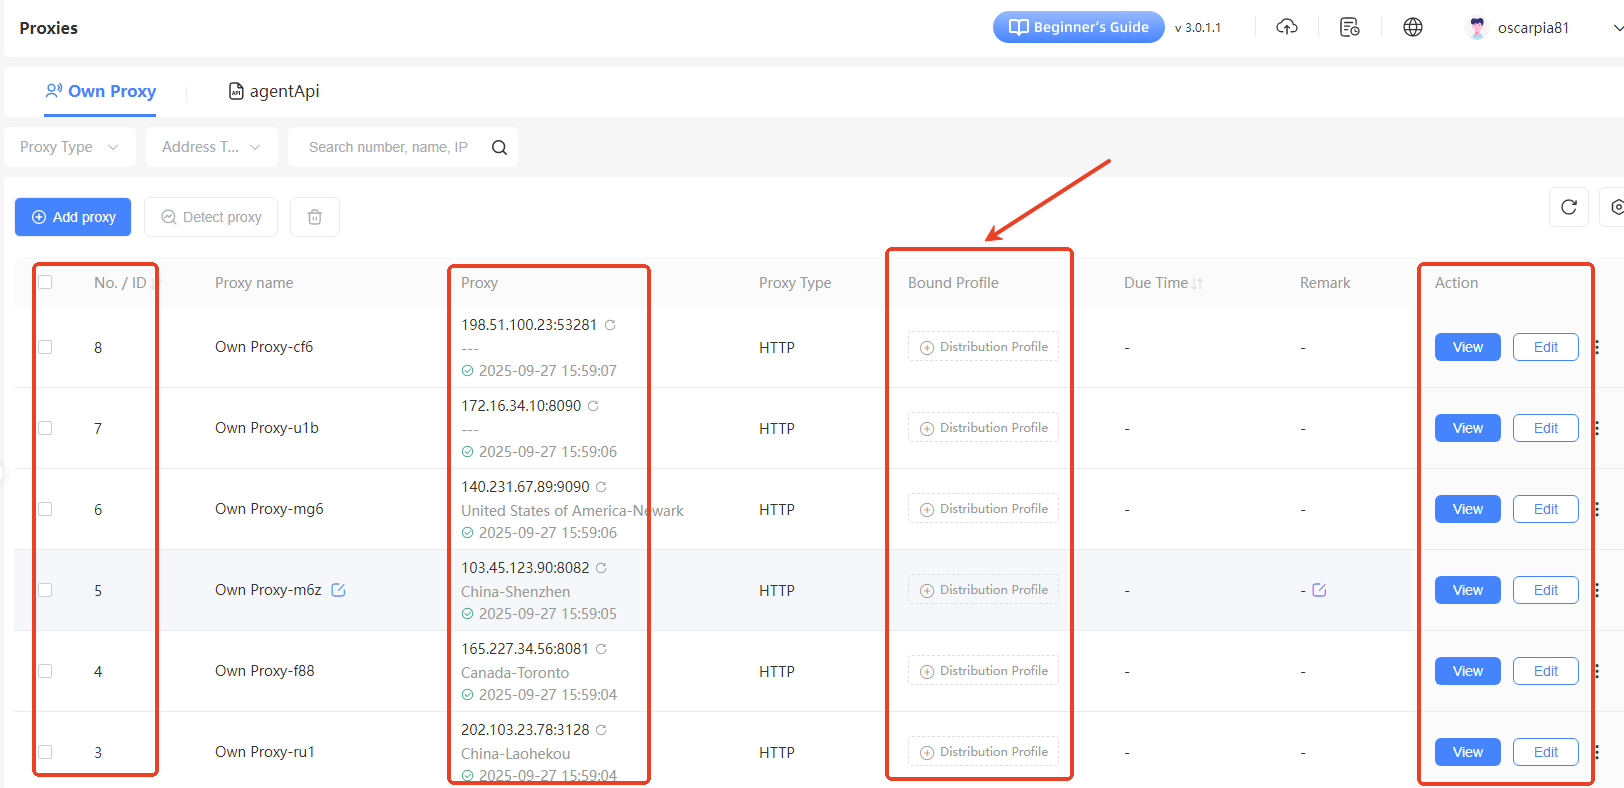
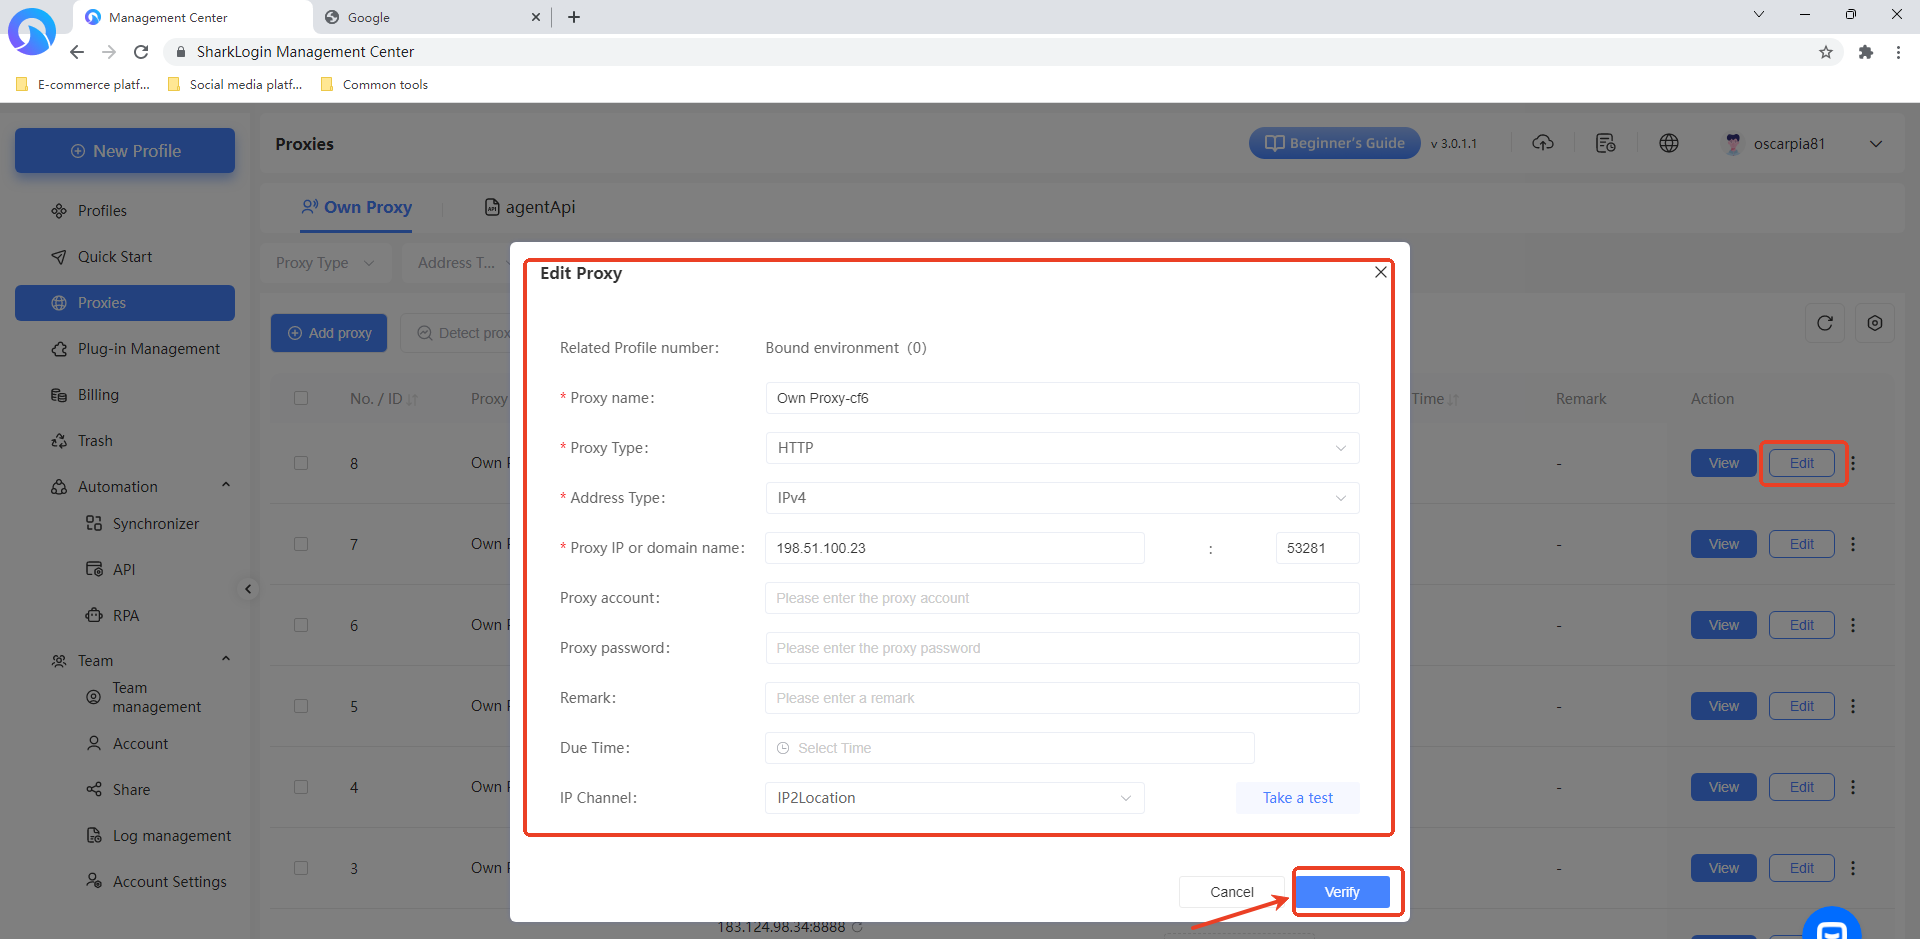
Step 5: View and Edit Proxies (Optional)
- View Proxy Details: On the “Own Proxy” page in “Proxy Management,” you can see details for each added proxy, including serial/ID, proxy name, proxy info (IP and port), proxy type, bound environment, expiration date, and notes. To view full details for a specific proxy, click the “View” button in the “Actions” column.
- Edit Proxy Information: To modify a proxy, click the “Edit” button in the “Actions” column for that proxy to open the “Edit Proxy” window. Here, you can update the proxy name, type, address type, IP or domain, port, username, password, notes, expiration date, and IP lookup source. After making changes, click the “Verify” button to save.