-
Getting Started
-
Environment Management
-
Proxy
-
Group Management
-
Automation
-
FAQs
Step 1: Using SharkLogin Anti-detect Browser
I. Preparation (Check These First)
- Get a reliable computer ready (Windows or macOS both work). SharkLogin supports both systems.
- Have an email address ready for receiving and sending emails to register.
- (Optional) Prepare a proxy/node (Residential, Datacenter, or Mobile) if you plan to simulate traffic from different countries/regions.
- Turn off any other anti-fingerprinting or proxy tools that might clash with the browser to avoid interference.
II. Download, Install, and Register (5 Minutes)
- Visit the SharkLogin official download page, choose your system, and download/install the software. Website: sharklogin.com
- Launch the app and register an account with your email (some versions may offer a free trial or short-term trial). (Check the website or ads for trial info)
- After logging in, take a quick look at the built-in “Beginner's Guide” or “Quick Start” page to get a fast grasp of the interface and basic features.
III. Core Features Introduction (Important)
- Profile (Settings/Personal Data): Think of it as an “isolated browser environment” with its own fingerprint, device info, Cookies, etc. Use a different profile for each account or purpose.
- Fingerprint: This is the “identity signature” of your browser/device on a website. An anti-detection browser gives each profile a unique, realistic fingerprint.
- Proxy: Assigns different IPs or locations to profiles to prevent multiple profiles from sharing the same public IP and getting linked.
- Browser Core: SharkLogin supports different cores (like Chrome or Firefox-based cores). Pick the one most compatible with your target website.
IV. Starting from Scratch: Let's Build Your First Environment
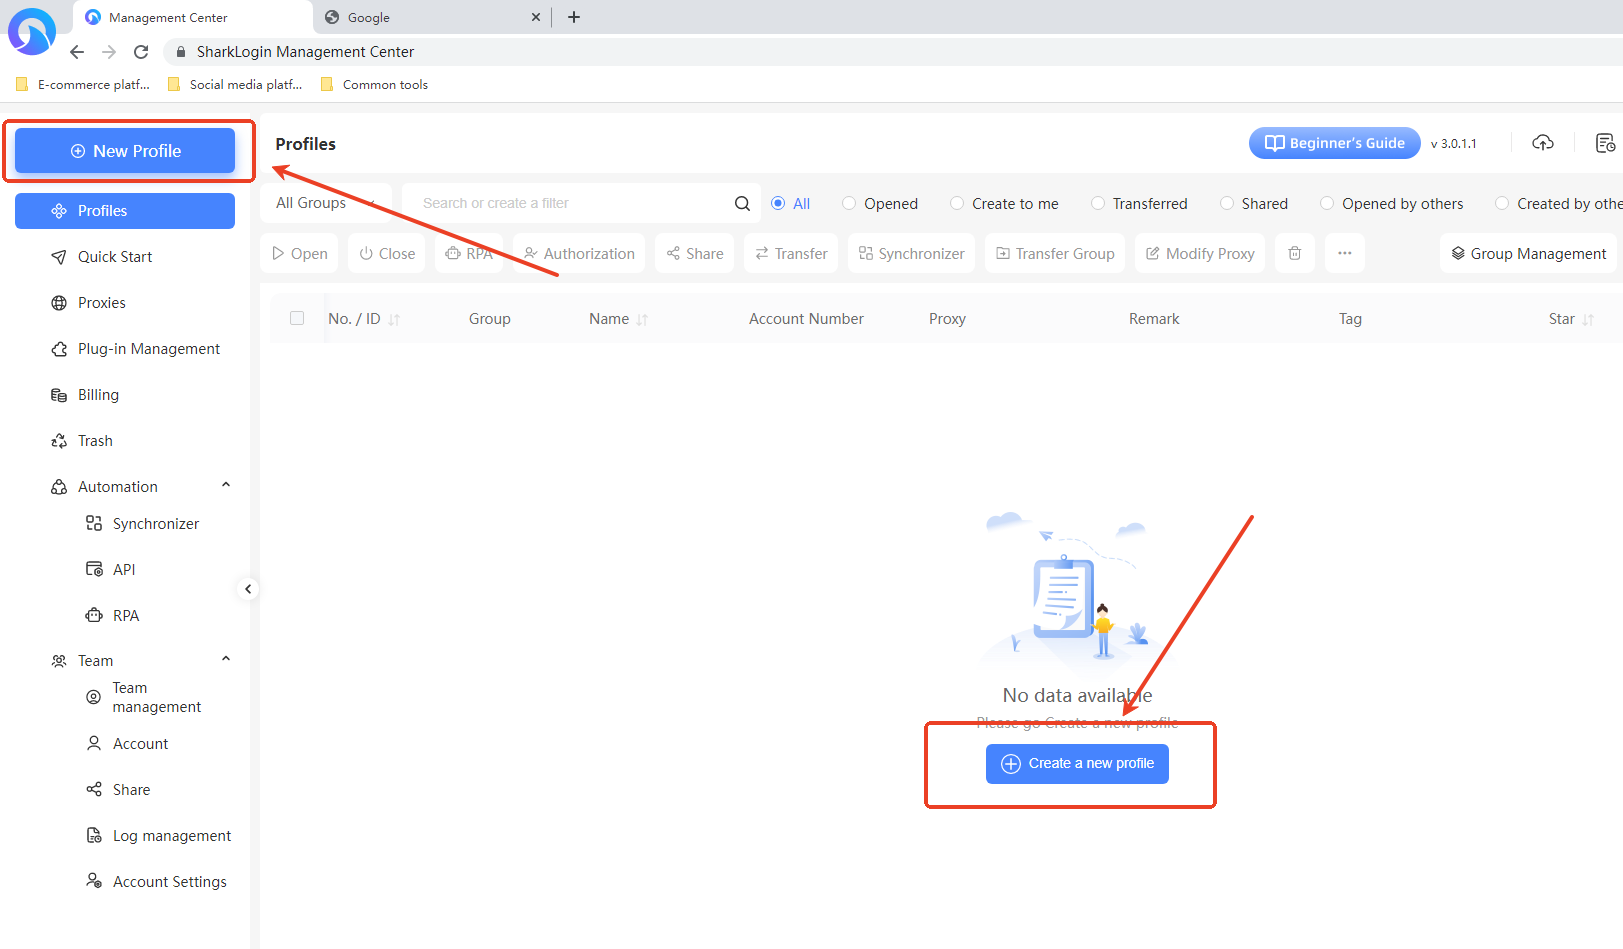
- Open the client and click “New Profile” on the main interface.
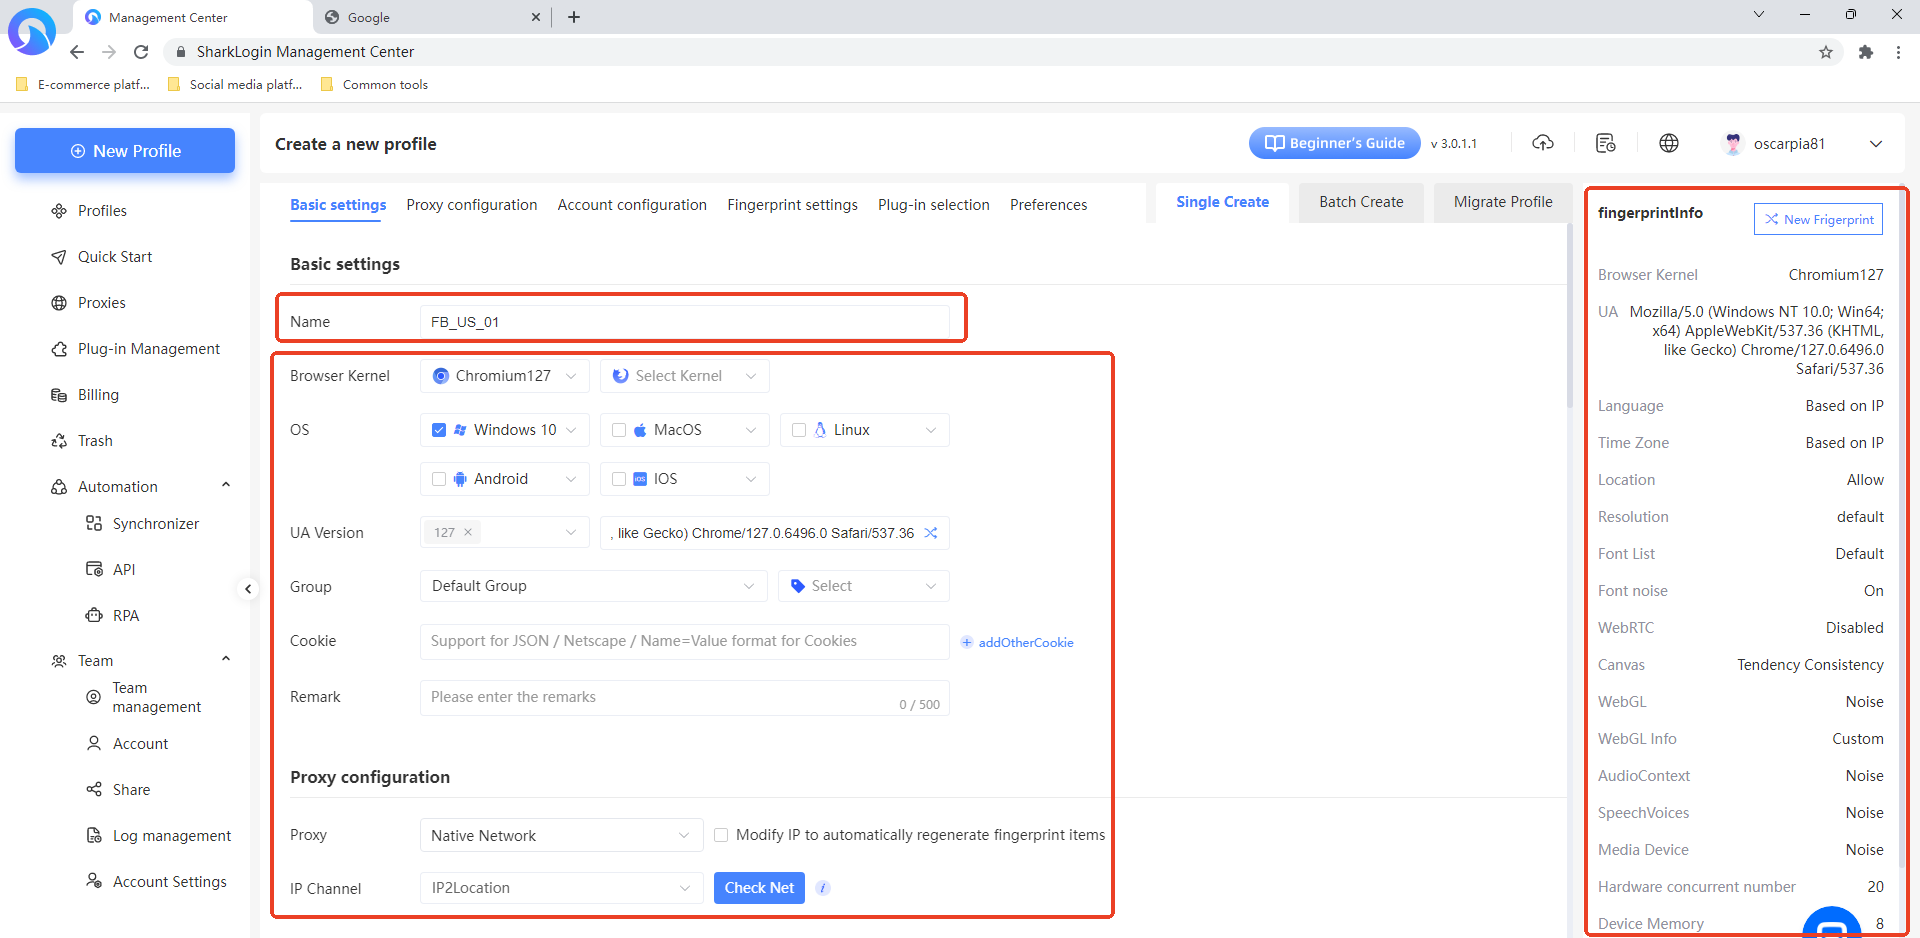
Step 1: Name Your Environment (Makes Management Easy)
In the “Basic Settings” “Name” field, name it using the format “Platform_Country_Sequence” (e.g., FB_US_01, Shopify_EU) for easy identification and management later.
Step 2: Choose a Browser Core
In the “Basic Settings” “Browser Core” section, select a core version (if unsure about compatibility, go with the Chromium core, like Chromium127 shown in the interface, as it's more compatible).
Step 3: Set Device Type and System Info
- Operating System: In the “Basic Settings” “Operating System” section, check the box for the system your target users commonly use (e.g., the interface might default to Windows 10, but you can pick macOS/Linux based on your needs).
- Language, Time Zone, Screen Resolution: In the “fingerprintinfo” section on the right, set language and time zone to “Generate based on IP” (or manually match them to your target country). Screen resolution can be left as default or adjusted to match the target device.
Step 4: Configure Fingerprint Parameters (Make It Feel Real)
- Auto-Generate: Click the “Generate New Fingerprint” button on the right to quickly create a realistic fingerprint combo (including randomized settings for User-Agent, Canvas, WebGL, etc.).
- Manual Fine-Tuning: For more precise control, manually adjust fields in the “fingerprintinfo” section, like User-Agent, Canvas (e.g., “Favor Consistency” in the interface), WebGL (e.g., “Noise”), font list, AudioContext, etc.
Step 5: Assign a Proxy (Ensure IP Matches Region)
In the “Proxy Settings” “Proxy Info” dropdown, select or enter proxy details:
- Format: IP:Port
- Type: Choose HTTP/SOCKS5 (based on what your proxy provider offers).
- Authentication: If the proxy requires a username/password, fill those in.
Make sure the proxy's geographic location matches the language, time zone, etc., from Step 3.
Step 6: Save and Launch the Environment
Click the buttons at the bottom of the interface:
- Confirm: Saves the current environment settings.
- Confirm and Create Next : Saves the current environment and starts a new one.
After saving, launching the environment opens an isolated browser window where all settings (core, system, fingerprint, proxy, etc.) take effect. - Following these steps, you've successfully set up and launched a SharkLogin anti-detection fingerprint browser environment.
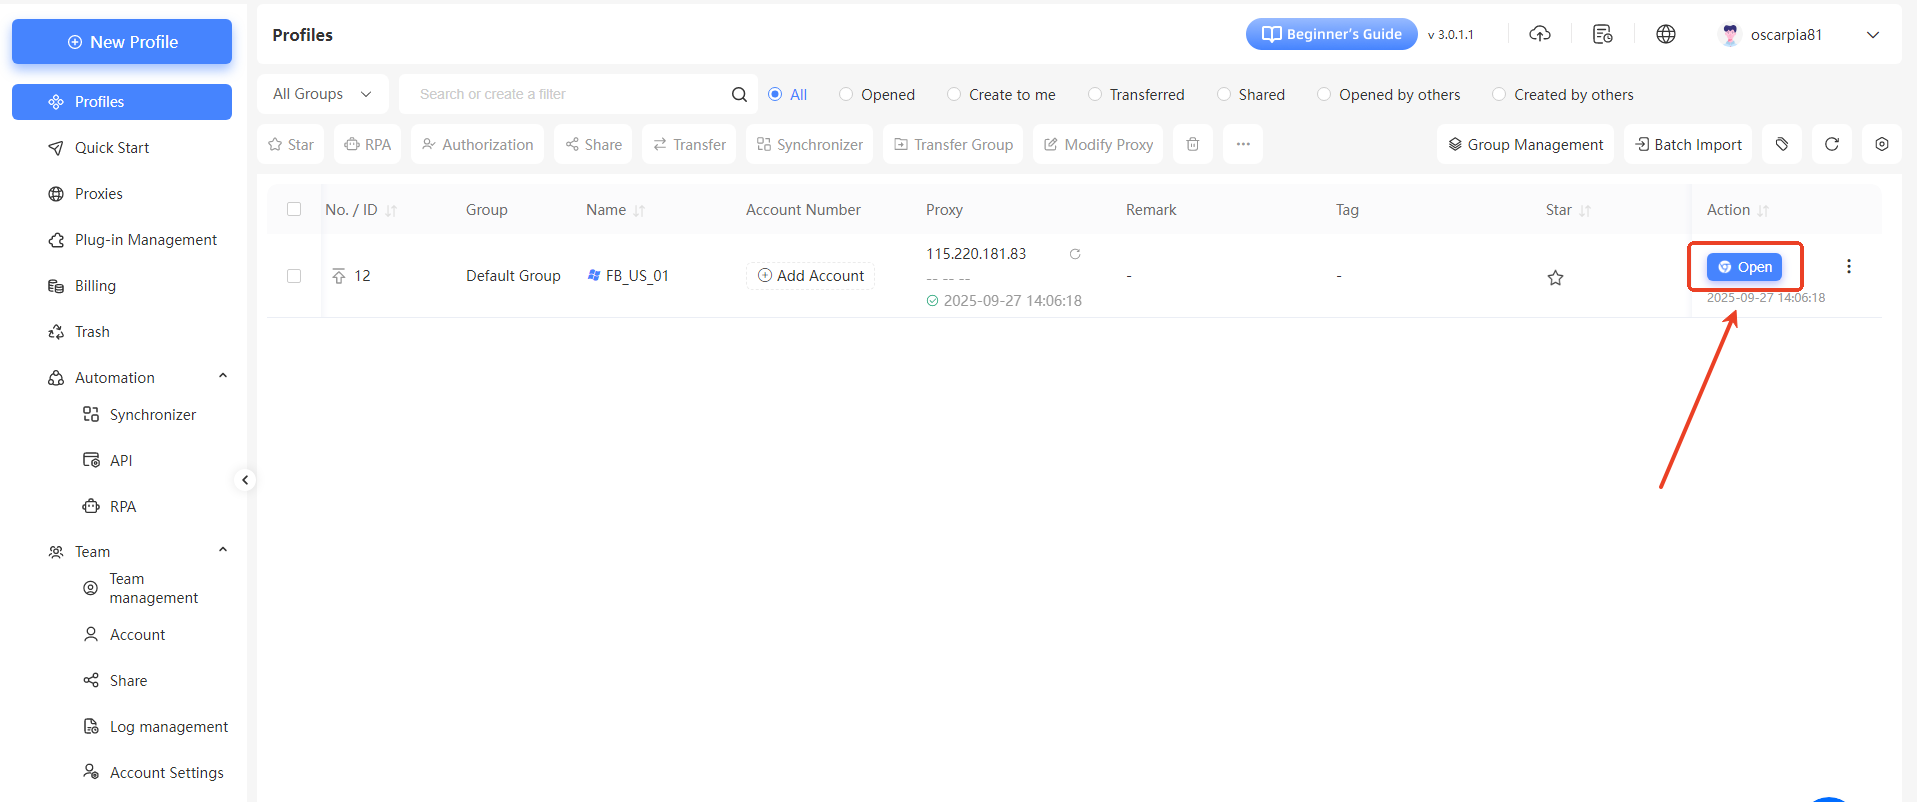
After Setup:
Go to “Environment Management” in the left sidebar, find your target environment in the list (e.g., “Shark Browser” as shown in the example). In the “Actions” column for that environment, click the “Open” button.
This opens an isolated browser window where all settings (browser core, system info, fingerprint parameters, proxy, etc.) are active, and you can start browsing.
Quick Tip: For your first test,try a simple website(like a webmail login or social media) to check if it loads properly and you can login in without issues.