-
Getting Started
-
Environment Management
-
Proxy
-
Group Management
-
Automation
-
FAQs
Step 4: Managing and Editing Created Profiles
Step 4: Managing and Editing Created Profiles
When using SharkLogin, managing and editing your created profiles ensures they stay tailored to your needs. Below are the detailed steps to help you navigate this process.
I. Access the Profile Management Menu
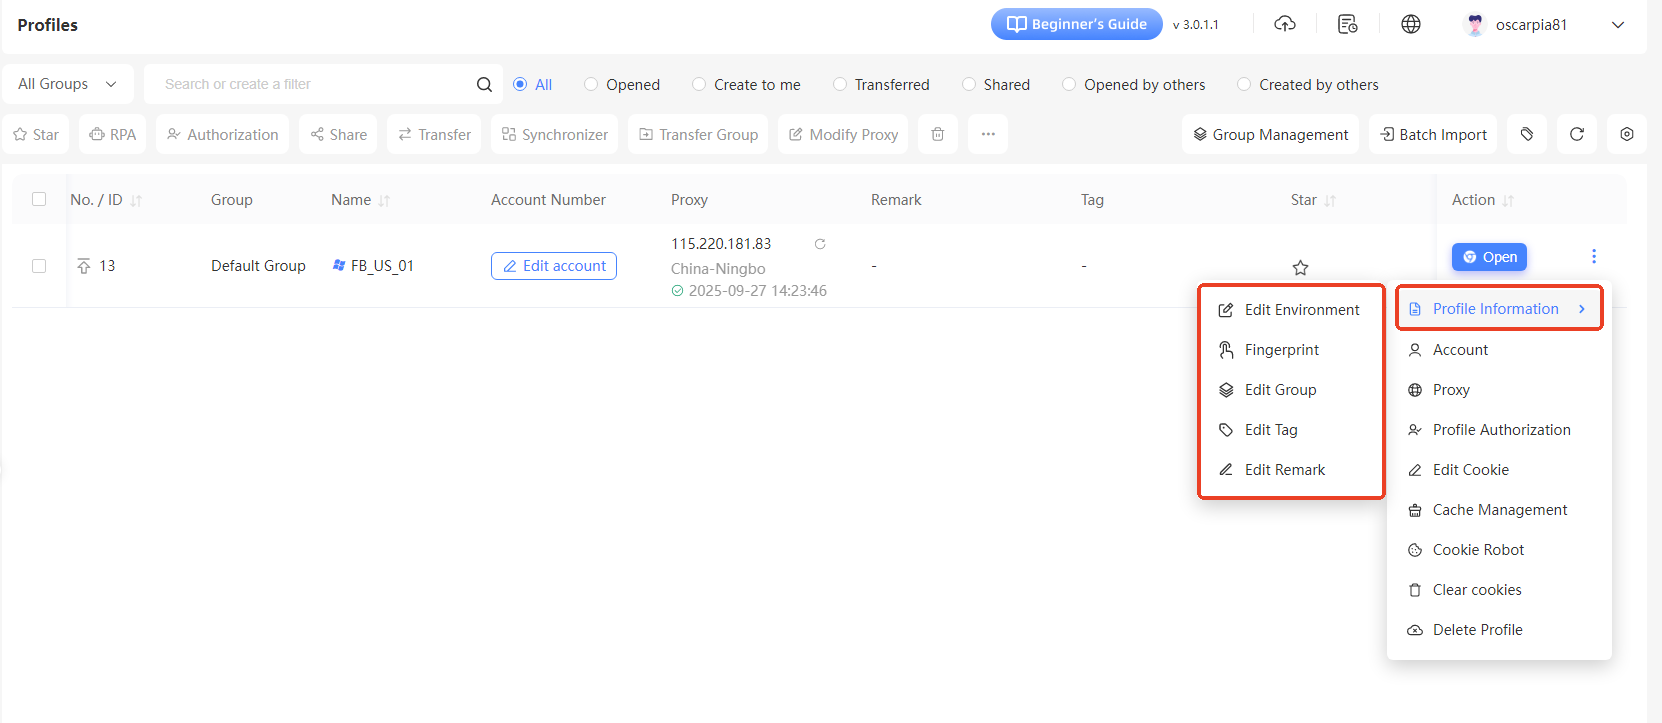
On the “Profiles” page, locate your target profile(e.g., the “FB_US_01” profile you created). Click the “More Options” button (usually a three-dot icon) in the “Actions” column for that profile to open the operations menu.
II. Choose the Relevant Management or Editing Option
In the dropdown menu, select the action based on your needs:
- Profile Information: View detailed info about the environment, like creation time and configuration overview, to get a quick snapshot of its setup.
- Account: Update or manage platform accounts (e.g., if a password changes or you need to add a new account).
- Proxy: Change or adjust proxy settings by selecting this option (refer to Step 3: “Adding an IP Proxy to Your Environment” for details).
- Edit Environment: Edit basic settings like browser core, operating system, or fingerprint parameters. This opens a setup interface similar to when you created the environment.
- Fingerprint: Fine-tune fingerprint settings (User-Agent, Canvas, WebGL, etc.) to enhance the environment's authenticity and uniqueness.
- Modify Group, Tags, or Notes: Organize multiple environments efficiently by setting groups, tags, or notes (e.g., grouping environments by platform or region).
III. Basic Settings Modification
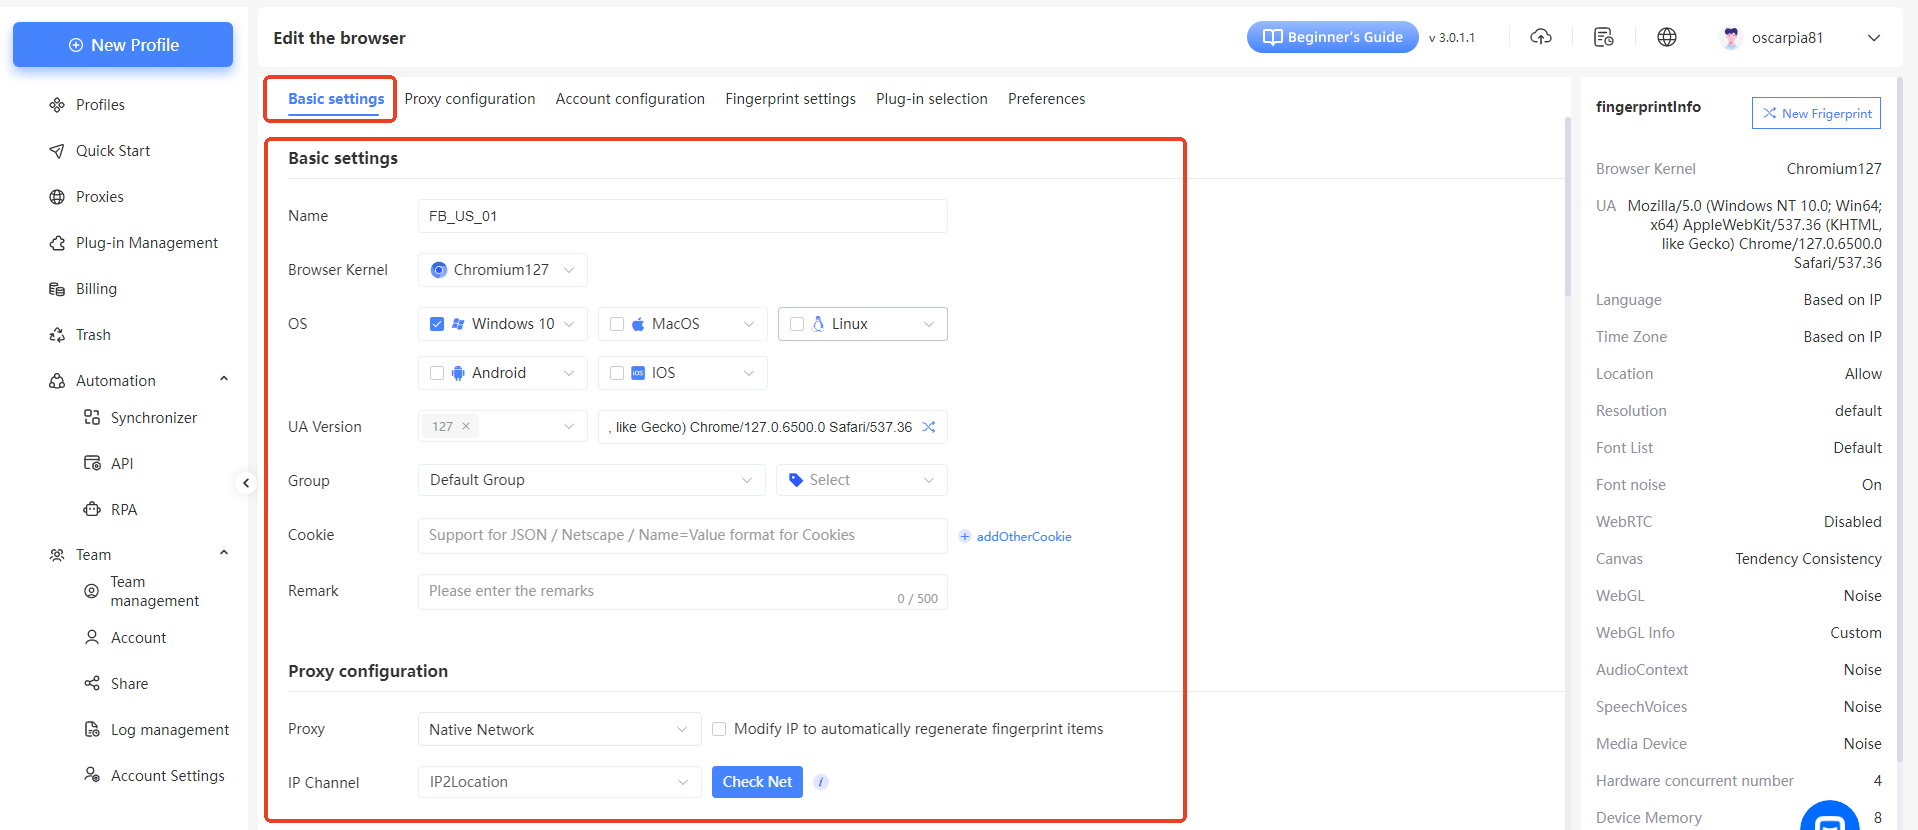
- Enter the “Edit Browser” Interface: On the “Profiles” page, find your target environment, click the “More Options” button in the “Actions” column, and select “Edit Environment” to open the “Edit the Browser” interface.
- Adjust Basic Parameters: In the “Basic Settings” tab, you can edit:
- Save Settings: Once done, click the “Verify” button at the bottom to save your changes.
IV. Fingerprint Settings Modification
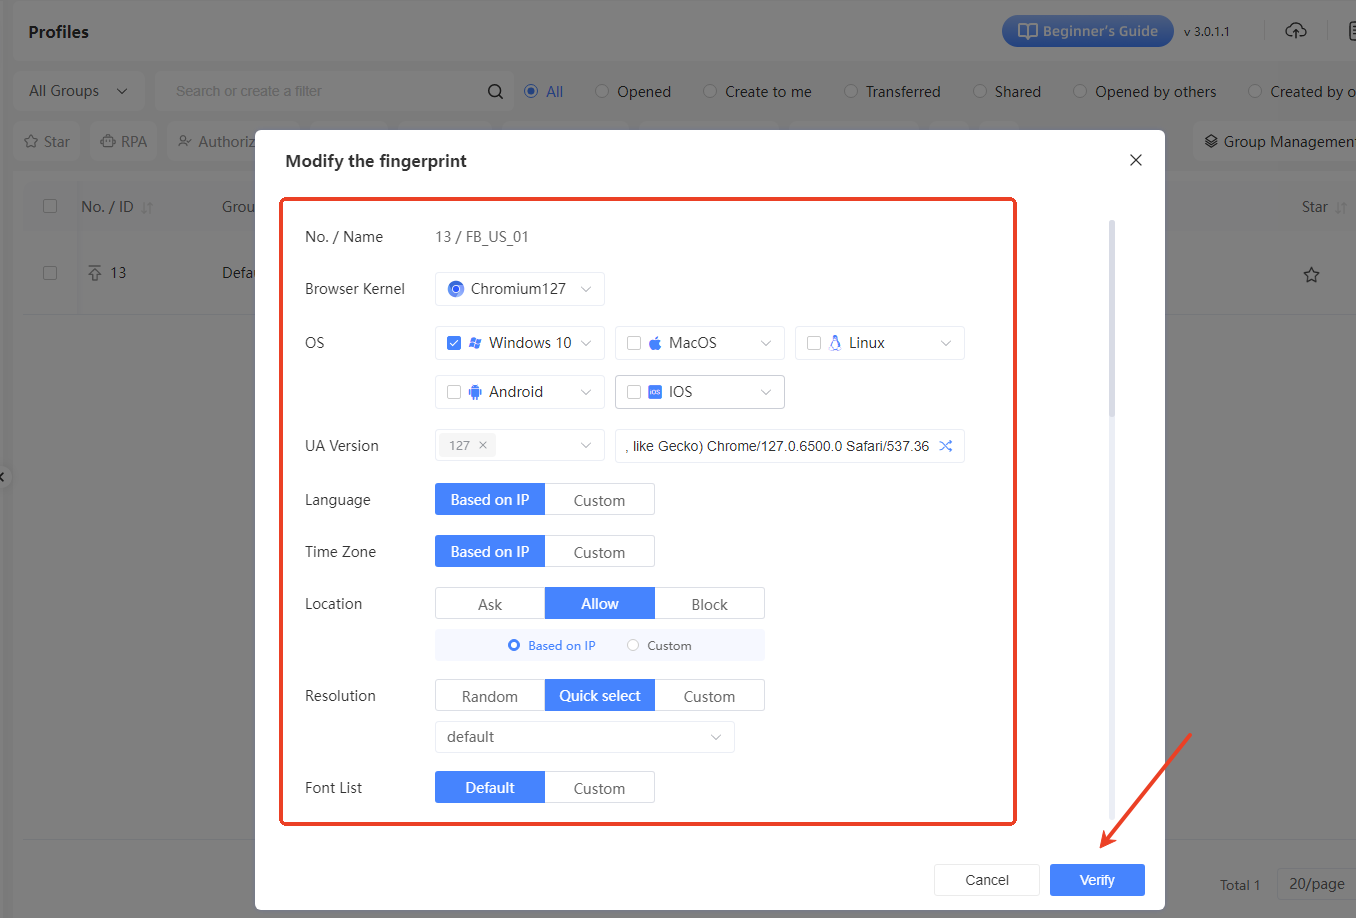
- Open the “Modify theFingerprint” Window: In the environment's operations menu, select “Fingerprint” to open the “Modify the Fingerprint” window.
- Adjust Fingerprint Parameters: In the window, configure:
- Confirm Changes: Click the “Verify” button to save the updated fingerprint settings.
V. Group Transfer
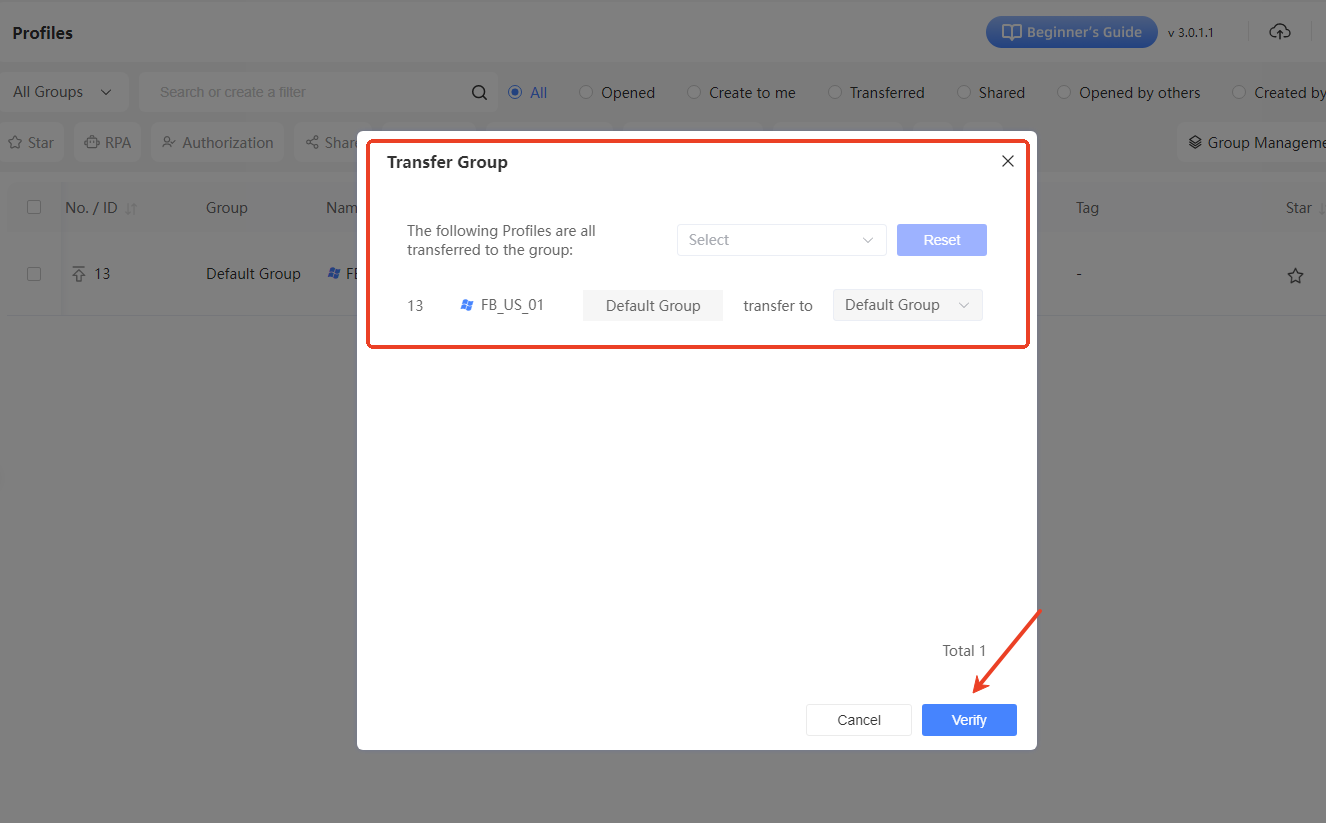
- Open the “Transfer Group” Window: In the environment's operations menu, select “Edit Group” to open the “Transfer Group” window.
- Select Target Group: In the “Transfer all environments to group” dropdown, choose the target group. For a single environment, select the group in the “Transfer to” dropdown.
- Confirm Transfer: Click the “Verify” button to complete the group transfer, making it easier to manage environments by group.
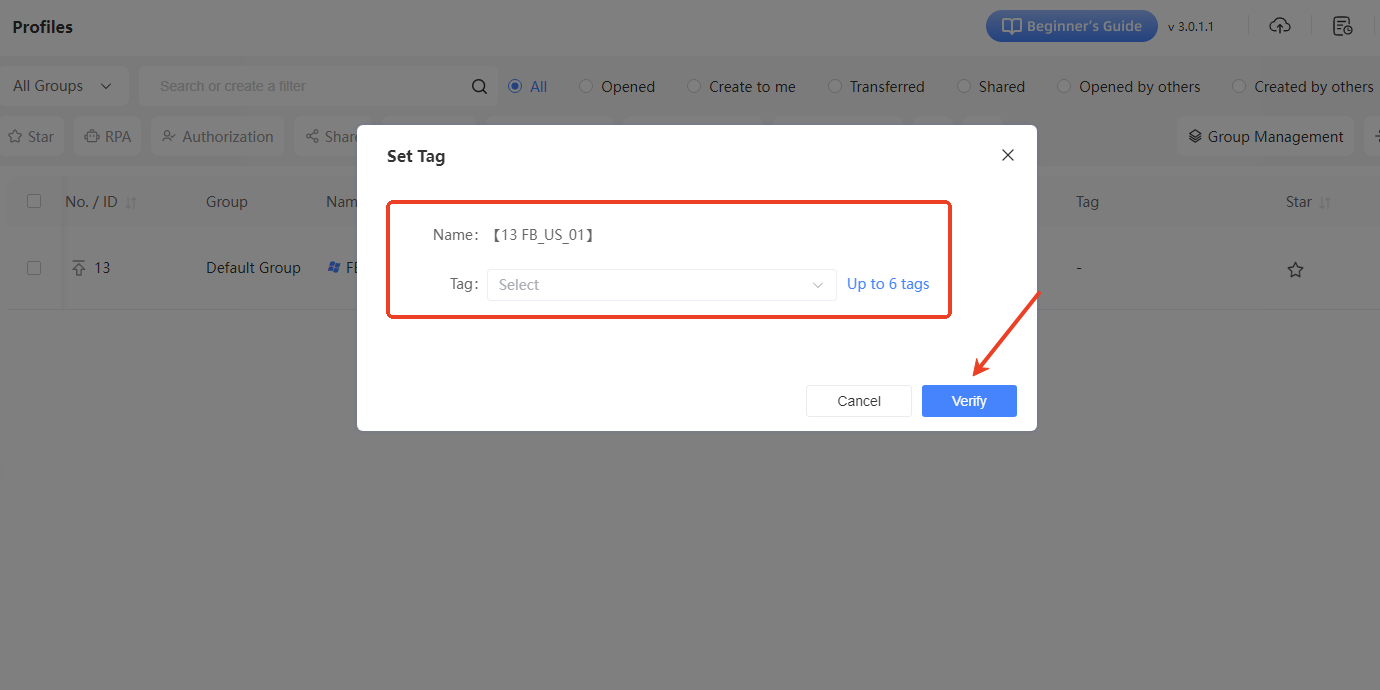
VI. Tag Settings
- Open the “Set Tags” Window: In the environment's operations menu, select “Edit Tags” to open the “Set Tags” window.
- Select or Add Tags: In the “Tags” dropdown, choose existing tags (up to 6) to label the environment's attributes (e.g., “E-commerce Platform” or “Social Media”).
- Confirm Settings: Click the “Verify” button to save the tags, allowing quick filtering of environments by tag.
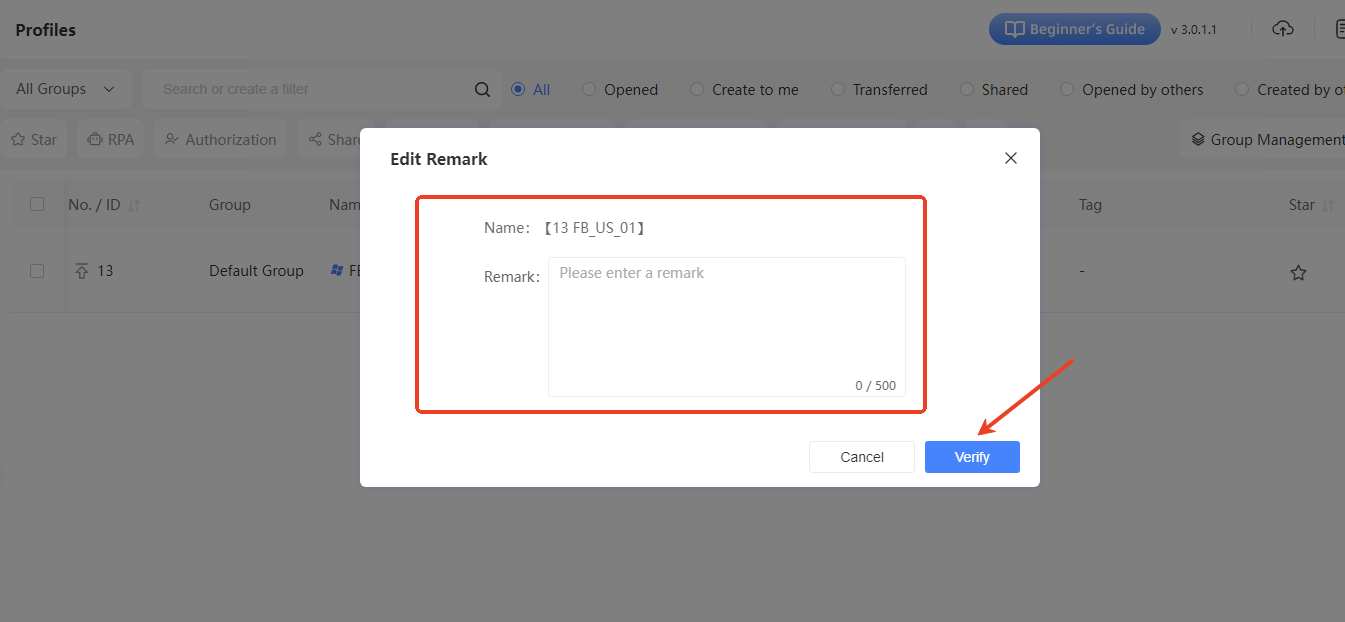
VII. Remark Editing
- Open the “Edit Remark” Window: In the environment's operations menu, select “Edit Remark” to open the “Edit Remark” window.
- Enter Remark Content: In the “Remark” field, add descriptive text about the environment (e.g., use case or special configuration details, up to 500 characters).
- Confirm Save: Click the “Verify” button to save the notes for easy reference later.
By following these detailed steps, you can flexibly manage and edit your created environments to keep them perfectly suited to your needs!