-
Getting Started
-
Environment Management
-
Proxy
-
Group Management
-
Automation
-
FAQs
Step 3: Use 3rd-party API proxy
Sep 27, 2025
454
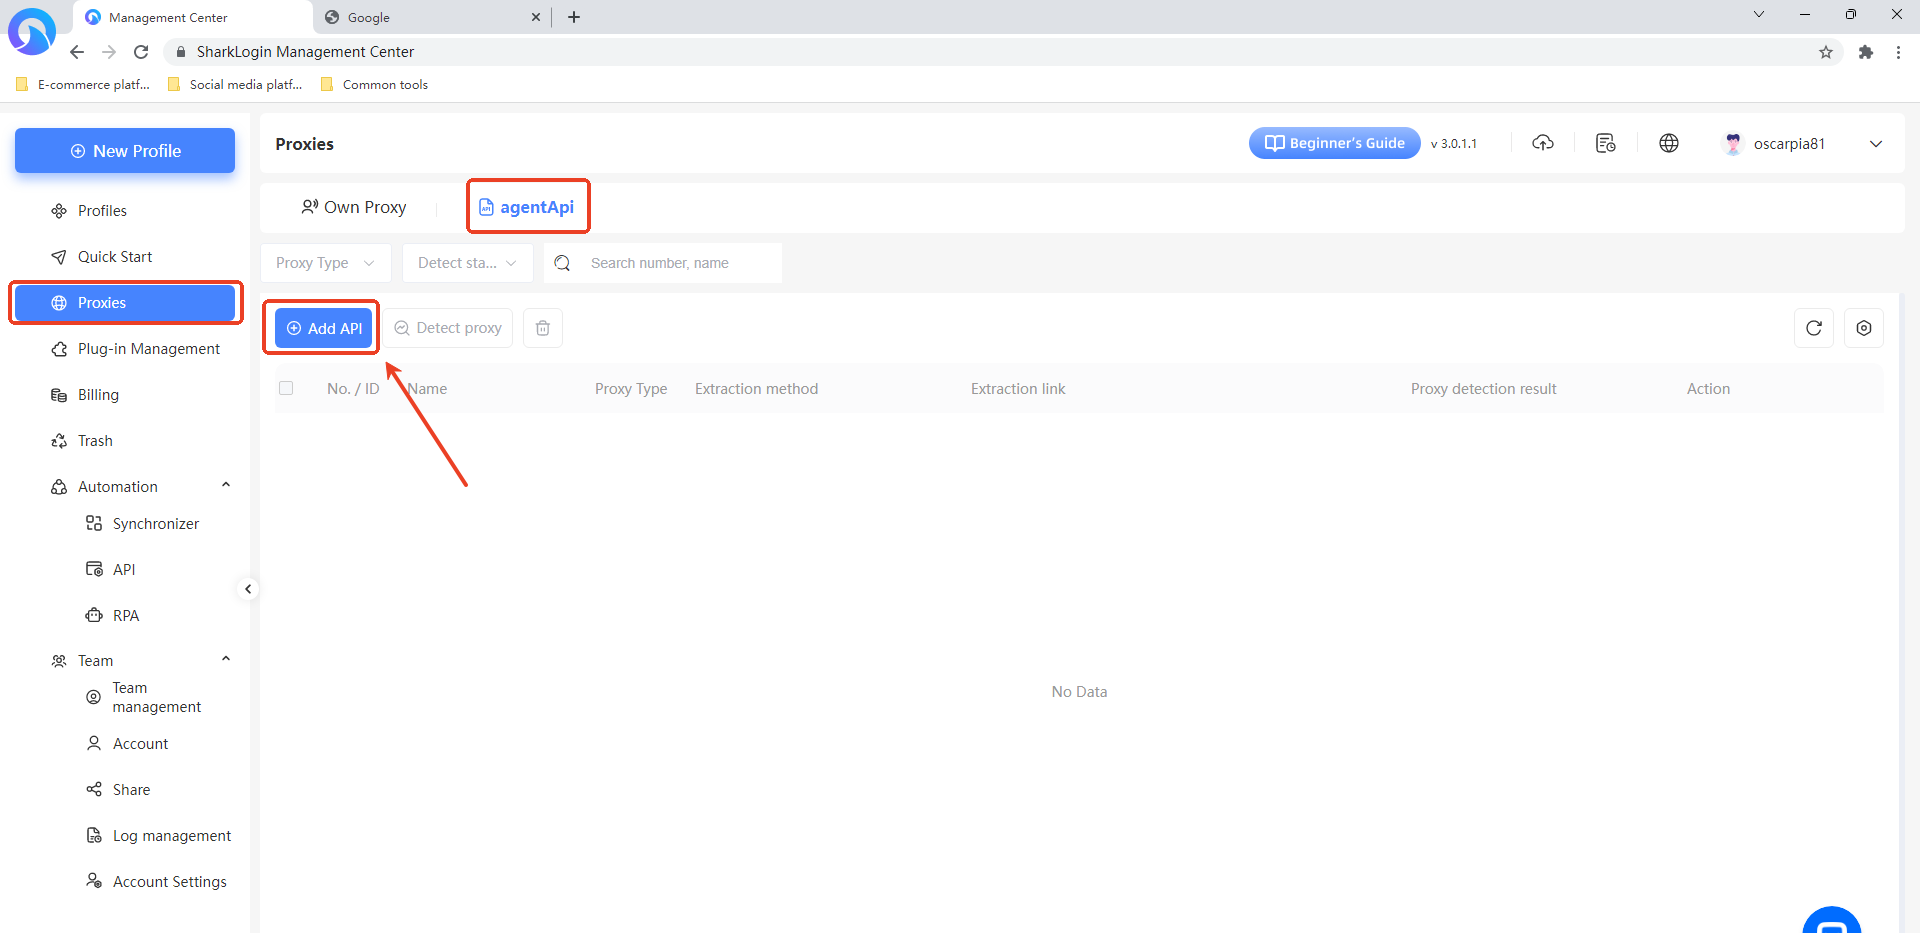
Step 1: Access the Proxy API Page
After logging into the SharkLogin client, click the “Proxy ” option in the left sidebar, then switch to the “AgentAPI” tab. On this page, click the “Add API” button.
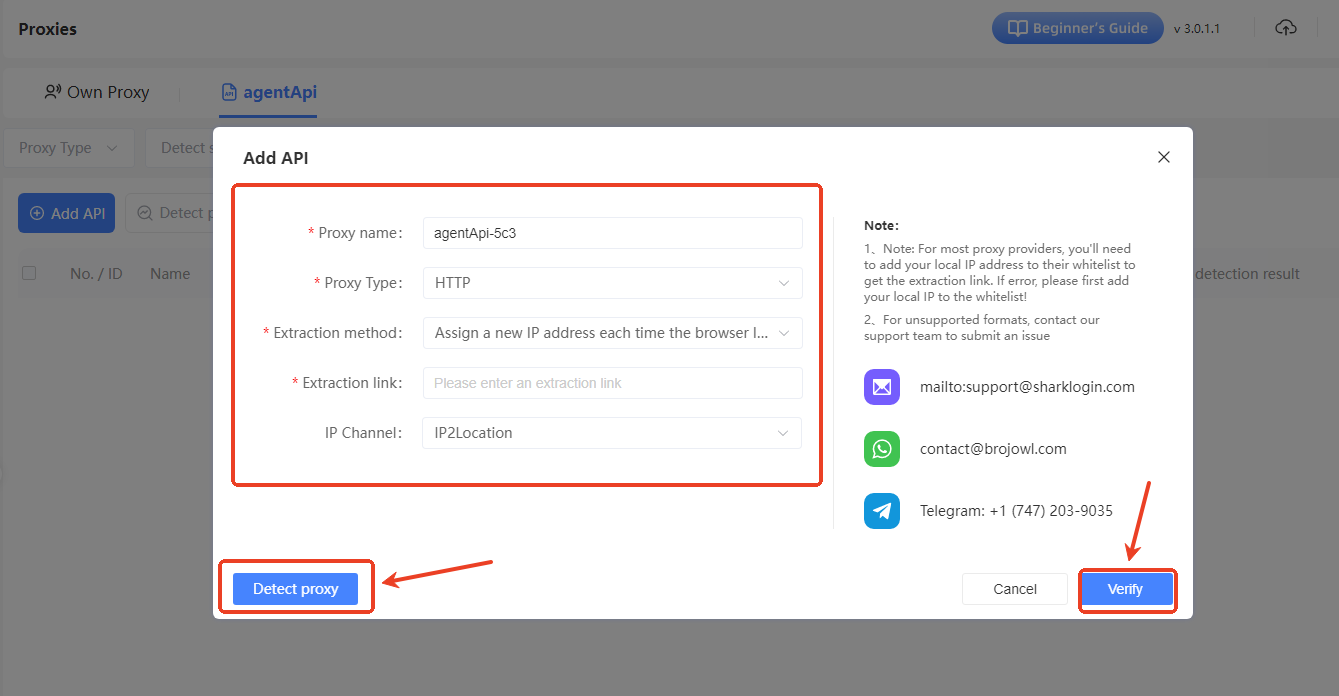
Step 2: Fill in API Proxy Details
In the “Add API” window that pops up, enter the following information:
- Proxy Name: Enter a name to identify the API proxy (e.g., “Proxy API - eok”).
- Proxy Type: Select the proxy type from the dropdown (e.g., HTTP).
- Extraction Method: Choose how IPs are extracted (e.g., “Extract a new IP each time the browser is opened”).
- Extraction Link: Input the third-party API's extraction link.
- IP Lookup Source: Select the IP lookup source (e.g., IP2Location).
After filling in the details, click the “Test Proxy” button to verify the API proxy.
If the test is successful, click the “Confirm” button.
檢測無誤後,點擊「確認」按鈕。
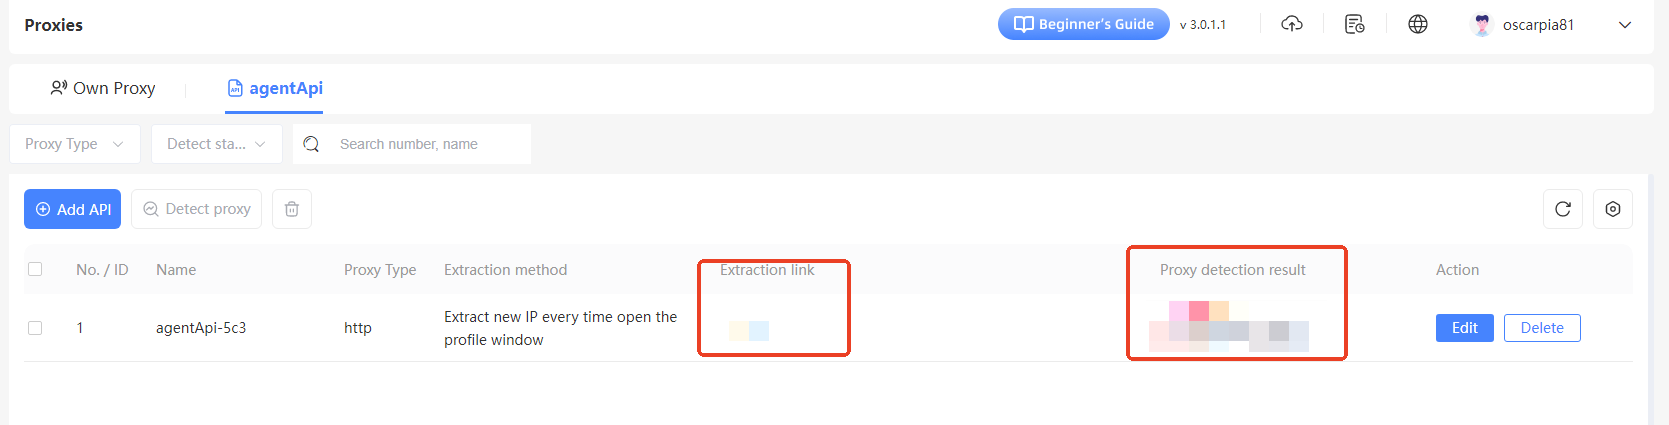
Step 3: Confirm API Proxy Addition
After clicking “Verify,” a “Successfully Added” notification will appear at the top of the page. The newly added API proxy will show up in the “Proxy API” list, displaying details like name, proxy type, extraction method, and extraction link. The third-party API proxy is now successfully added and ready for use when needed.
Was the content helpful?
Yes
No